|
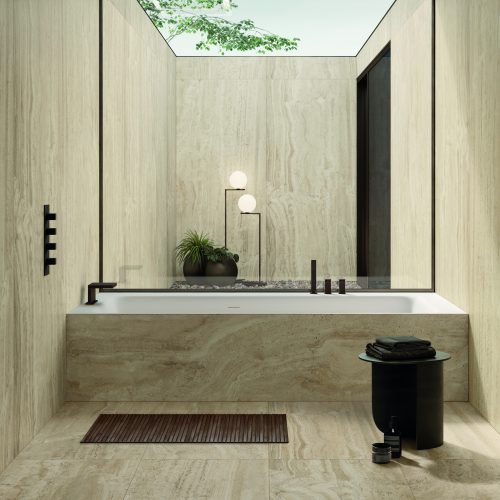
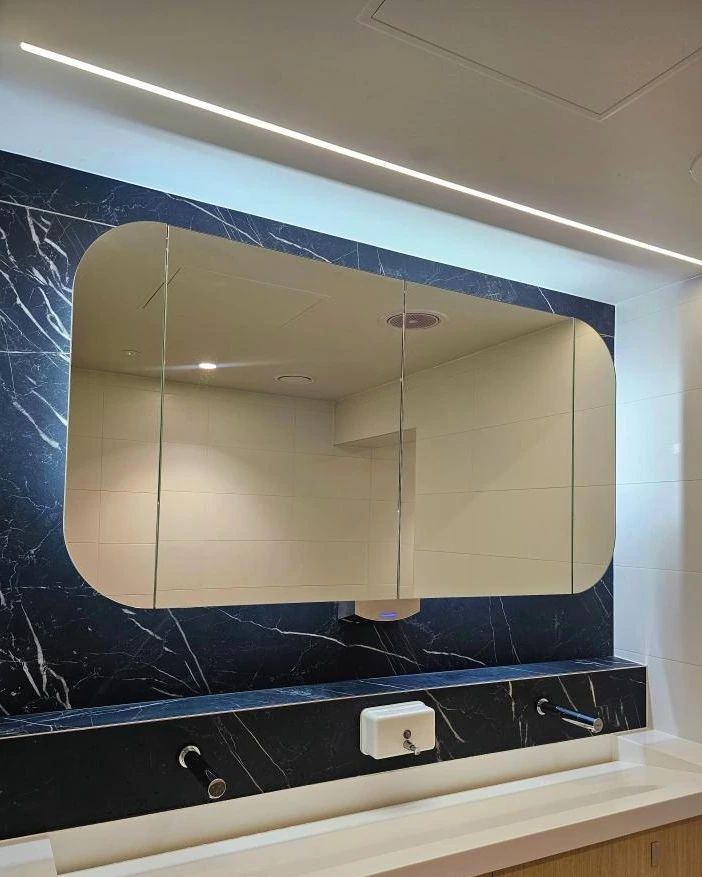
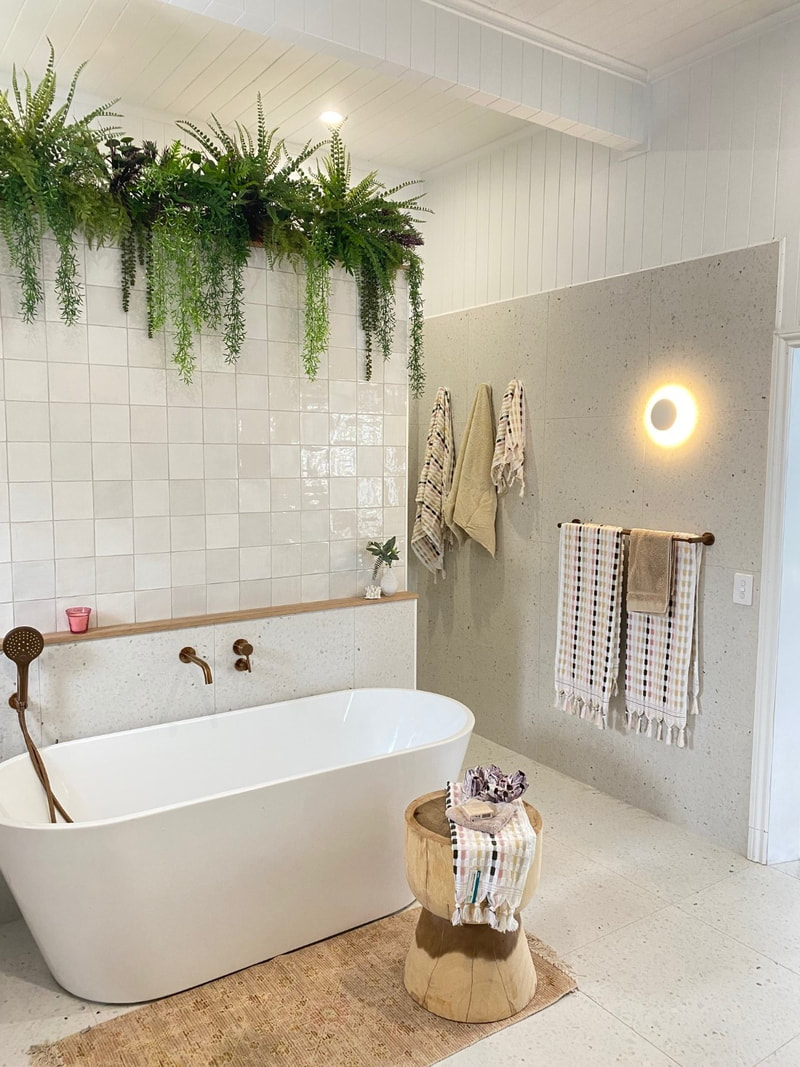
Exciting News from Nerang Tiles! Check out this stunning bathroom renovation done by one of our amazing customers featuring our LL130-STI Travertine Look Tile and AC088-GRN Hand Made Look Tile! 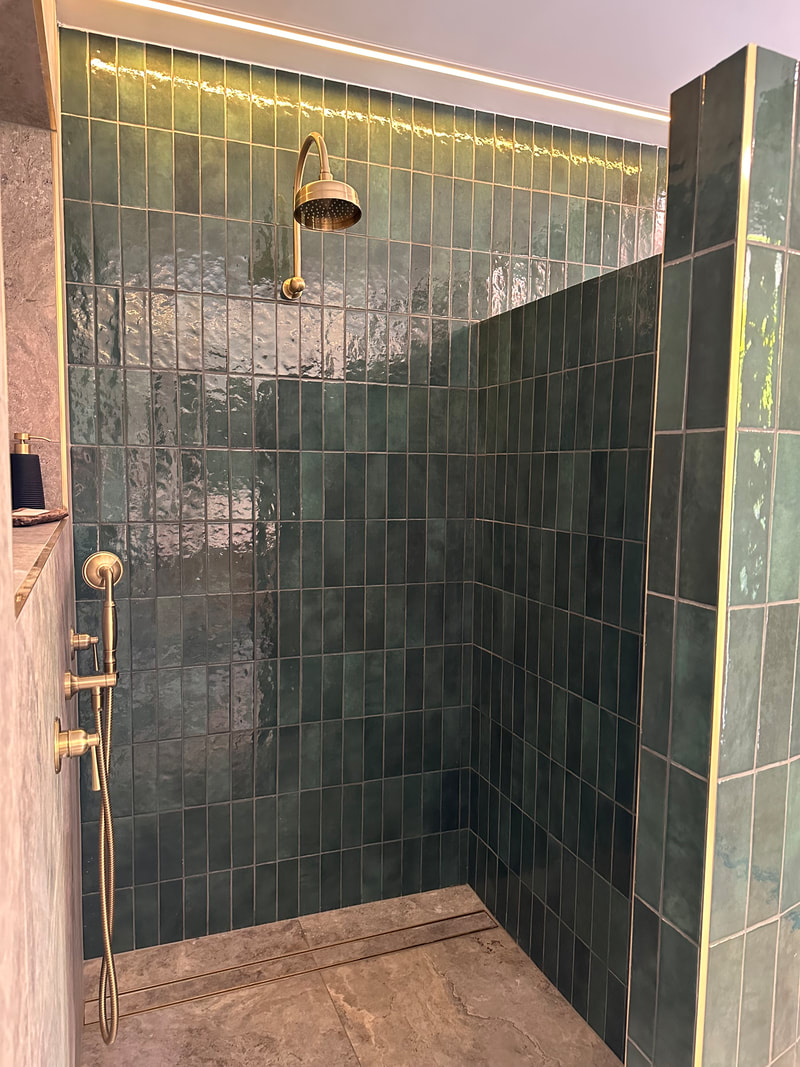 Witness the timeless elegance of our LL130-STI tile, adding a touch of luxury and sophistication to this beautiful bathroom space. 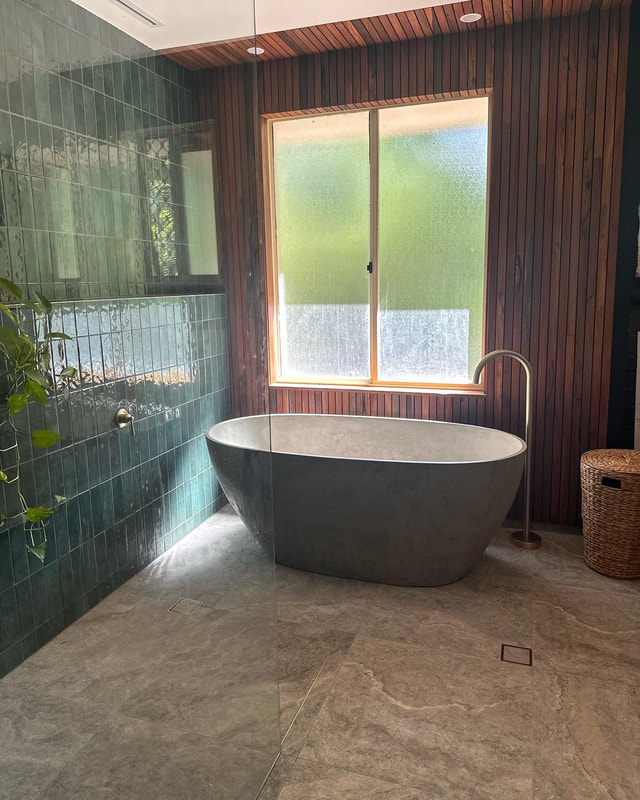 Our AC088-GRN Hand Made Look Tile brings artisanal charm and personality, making this renovation truly one-of-a-kind. 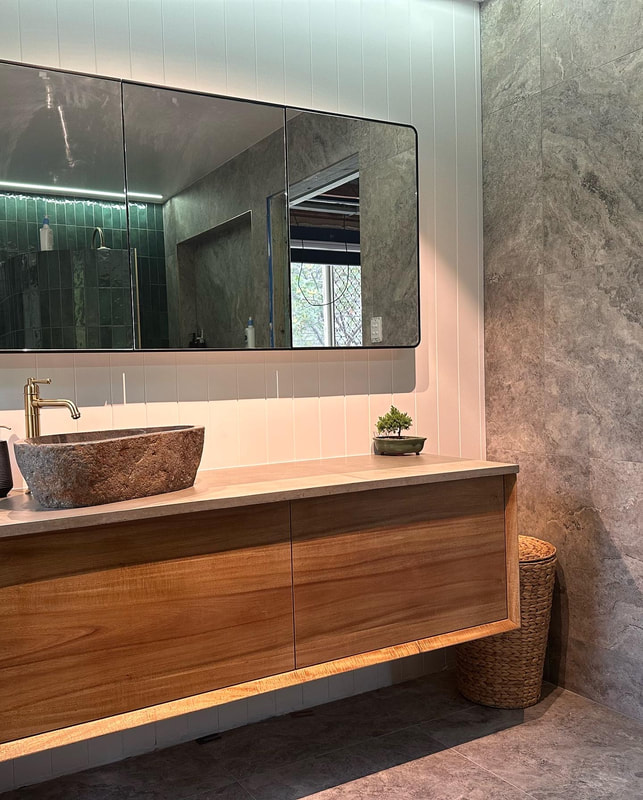 Ready to transform your bathroom into a sanctuary of style? Visit our showroom today and let us help you bring your vision to life with Nerang Tiles.
0 Comments
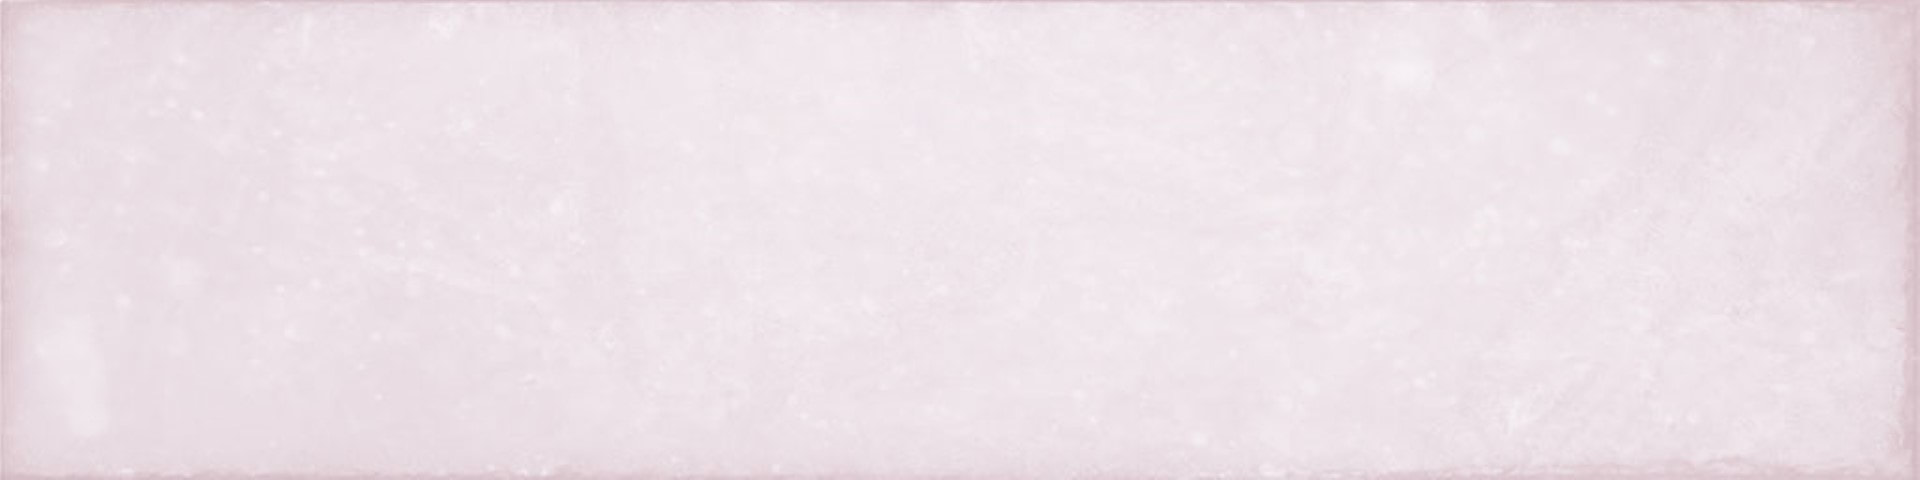
Welcome to the world of design refinement with the N-Drop Pink subway tile, a true testament to the artistry and craftsmanship emanating from Spain's renowned tile industry. As aficionados of interior aesthetics seek subtlety with a touch of sophistication, this tile emerges as a prime choice, offering both timeless elegance and contemporary allure.
 In the realm of home improvement, one often seeks the perfect balance between aesthetics and practicality. Enter tiles – the unsung heroes of interior design that not only elevates the visual appeal of your spaces but also offers remarkable cost saving benefits. Sealing SolutionsLet's address the elephant in the room – the perpetual struggle of sealing porous surfaces to prevent water damage and staining. Unlike other flooring options, tiles boast inherent water resistant properties, eliminating the need for expensive sealing treatments. Minimal Maintenance, Maximum SavingsTime is money, and tiles understand the value of both. Bid farewell to labour intensive maintenance routines and exorbitant upkeep expenses with tiles that require minimal care to maintain their pristine appearance. A simple sweep and mop suffice to keep tiles gleaming, sparing you the expense of specialized cleaning products and professional cleaning services. Durability RedefinedWhen it comes to longevity, tiles reign supreme as the unrivaled champions of durability. Engineered to withstand the trials of time and foot traffic, tiles emerge unscathed from the wear and tear of daily life, preserving their beauty and integrity for decades to come. Unlike their counterparts prone to scratches, dents, and warping, tiles stand as resilient sentinels of strength, sparing you the expense of premature replacements and costly repairs. Allergen AdversariesHealth is wealth, and tiles safeguard both with their hypoallergenic properties that repel dust, pollen, and other airborne allergens. Say goodbye to allergy induced medical expenses and hello to a healthier indoor environment courtesy of tiles that foster clean, breathable air. By minimizing allergen accumulation and facilitating easy cleaning, tiles not only save you money on healthcare costs but also enhance your overall well-being, ensuring a sanctuary of health and comfort for you and your loved ones. Energy Efficiency EnhancementsIn an era marked by escalating energy costs, every penny saved counts. Tiles play a pivotal role in enhancing energy efficiency by regulating indoor temperatures and reducing the need for artificial heating and cooling. Their thermal mass properties act as natural insulators, retaining heat in winter and keeping interiors cool in summer, thus lowering your reliance on HVAC systems and trimming your energy bills. The financial advantages of tiles extend far beyond their aesthetic appeal, encompassing sealing solutions, minimal maintenance, unrivaled durability, allergen resistance, and energy efficiency enhancements.
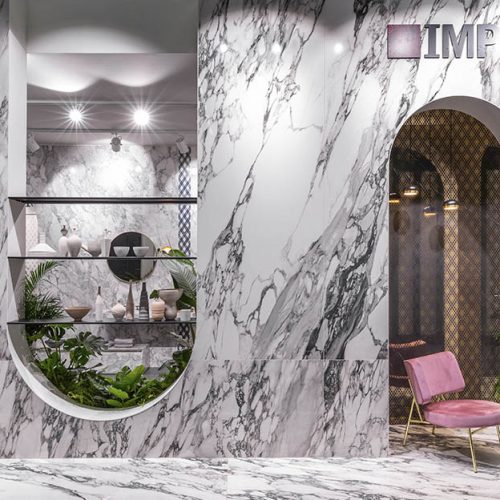
Backed by research and facts, tiles emerge as the epitome of cost effective flooring solutions that elevates your spaces while safeguarding your finances. So, why settle for fleeting investments when you can embrace the enduring allure of tiles and reap the rewards for years to come? Choose tiles today and embark on a journey of lasting beauty, savings, and satisfaction that transcends mere flooring – it's a lifestyle investment you won't regret. In the wake of Australia's historic decision to ban engineered stone due to the alarming rise in silicosis cases, homeowners, designers, and builders are seeking safe and stylish alternatives. Enter Nerang Tiles and Porcelain Slabs – the perfect solution to maintain the aesthetic appeal of your kitchen and bathroom spaces without compromising on safety. 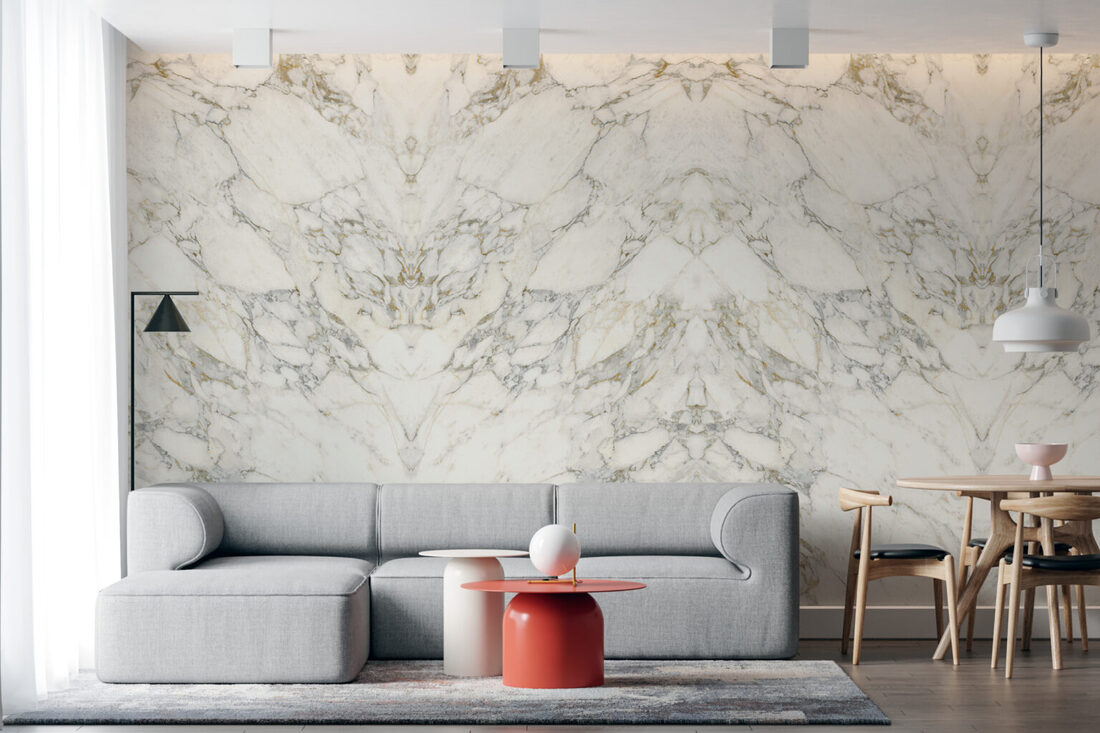 The Safety ImperativeWith the nationwide ban on engineered stone set to take effect in July 2024, there's a growing need for alternative materials that ensure the safety of workers and homeowners alike. Nerang Tiles and Porcelain Slabs stand out as excellent choices, providing a durable and stylish alternative without the health risks associated with silica dust exposure. The Rise of PorcelainAs the engineered stone era comes to an end, the spotlight is on porcelain as a versatile and low-risk option. Porcelain slabs offer a stunning array of designs, mimicking the luxurious look of natural materials like granite and marble without the health concerns. Discover the beauty of porcelain and its myriad applications in modern interiors.
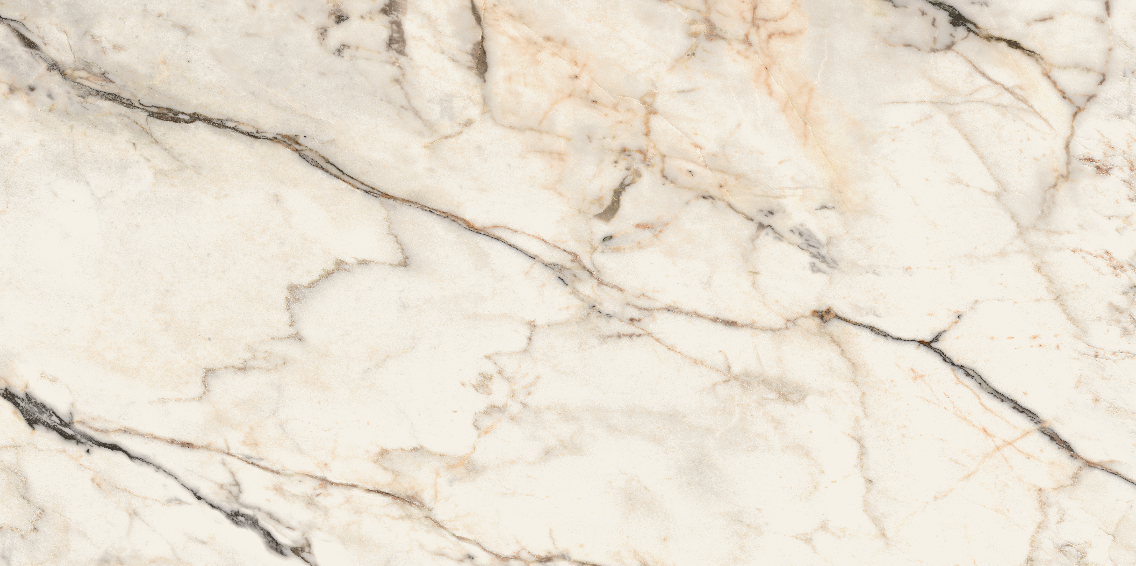
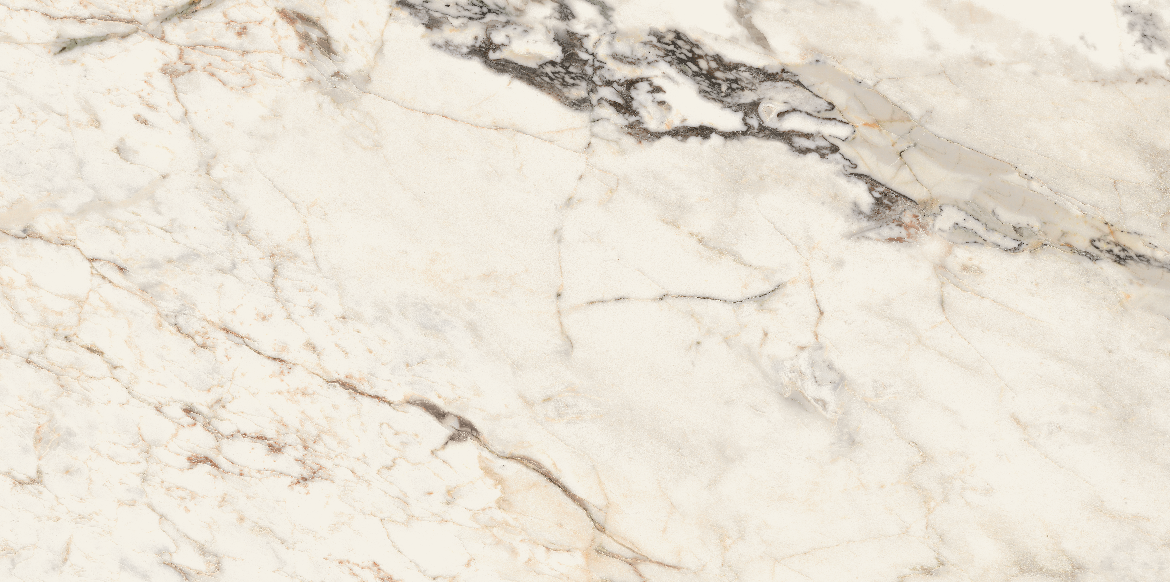
Discover The Range of Porcelain SlabsAvailable in a range of large format glazed porcelain slabs suitable for indoor, outdoor, floor and wall applications, including benchtops, wet areas and more - Porcelain Slabs 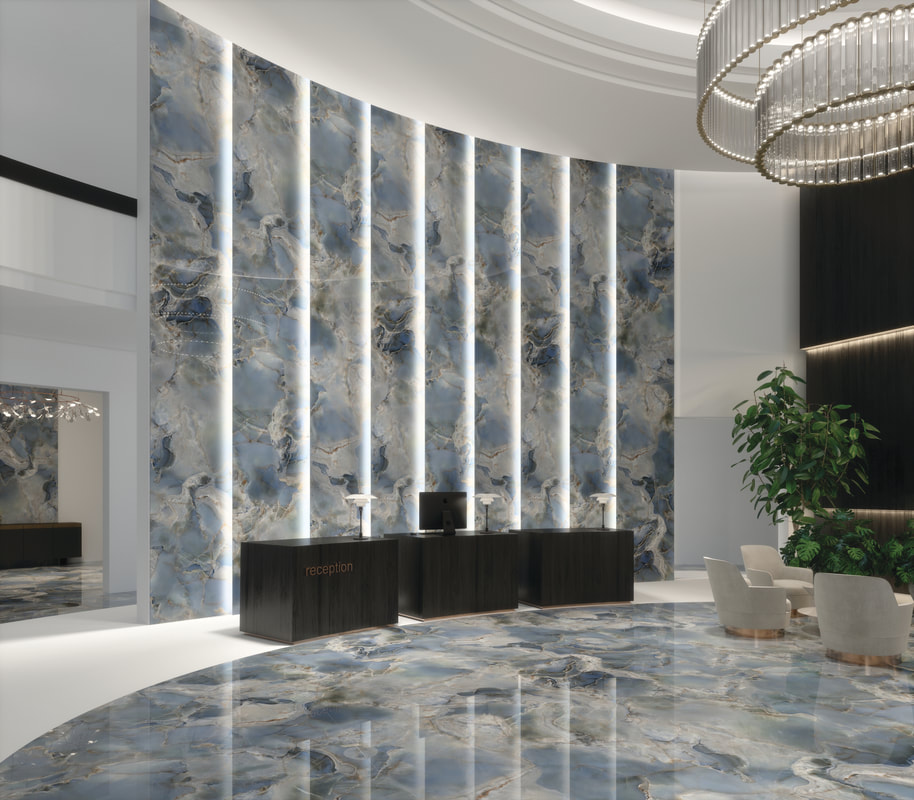 Practicality and VersatilityNerang Tiles and Porcelain Slabs aren't just about aesthetics – they bring practicality and versatility to the forefront. Discover how these materials are not only resistant to scratches and stains but also easy to clean, making them ideal for high-traffic areas in your home. 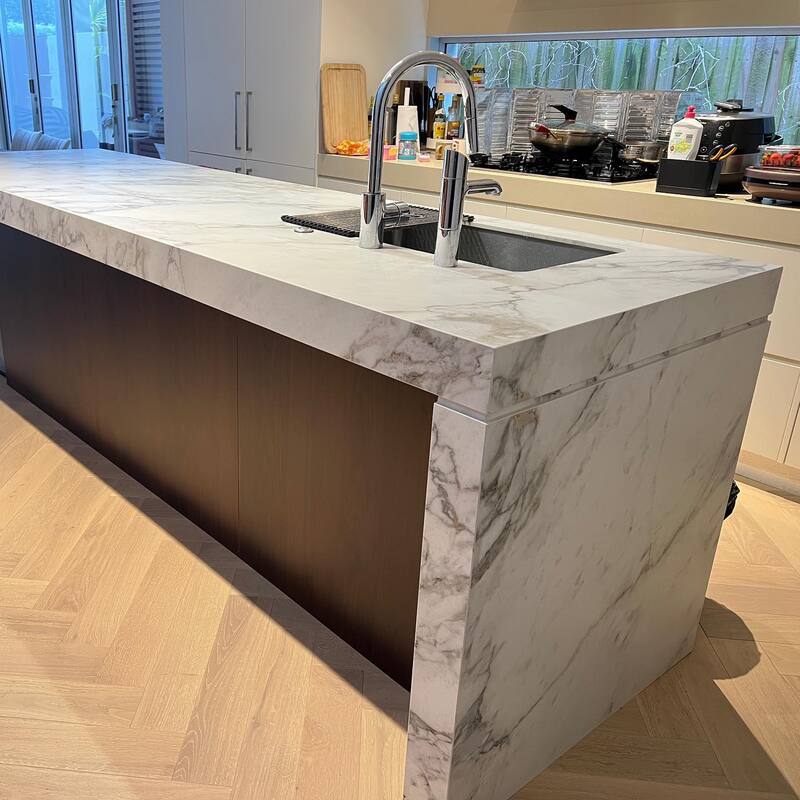 As we bid farewell to engineered stone in the wake of health concerns, the future of interior design lies in the hands of innovative and safe materials like Porcelain Slabs. Embrace a new era of style, where beauty and well-being coexist harmoniously. Stay ahead of the curve and make the switch to materials that prioritize your health without compromising on the aesthetic appeal of your home. The revolution begins with Nerang Tiles and Porcelain Slabs – where safety meets sophistication. 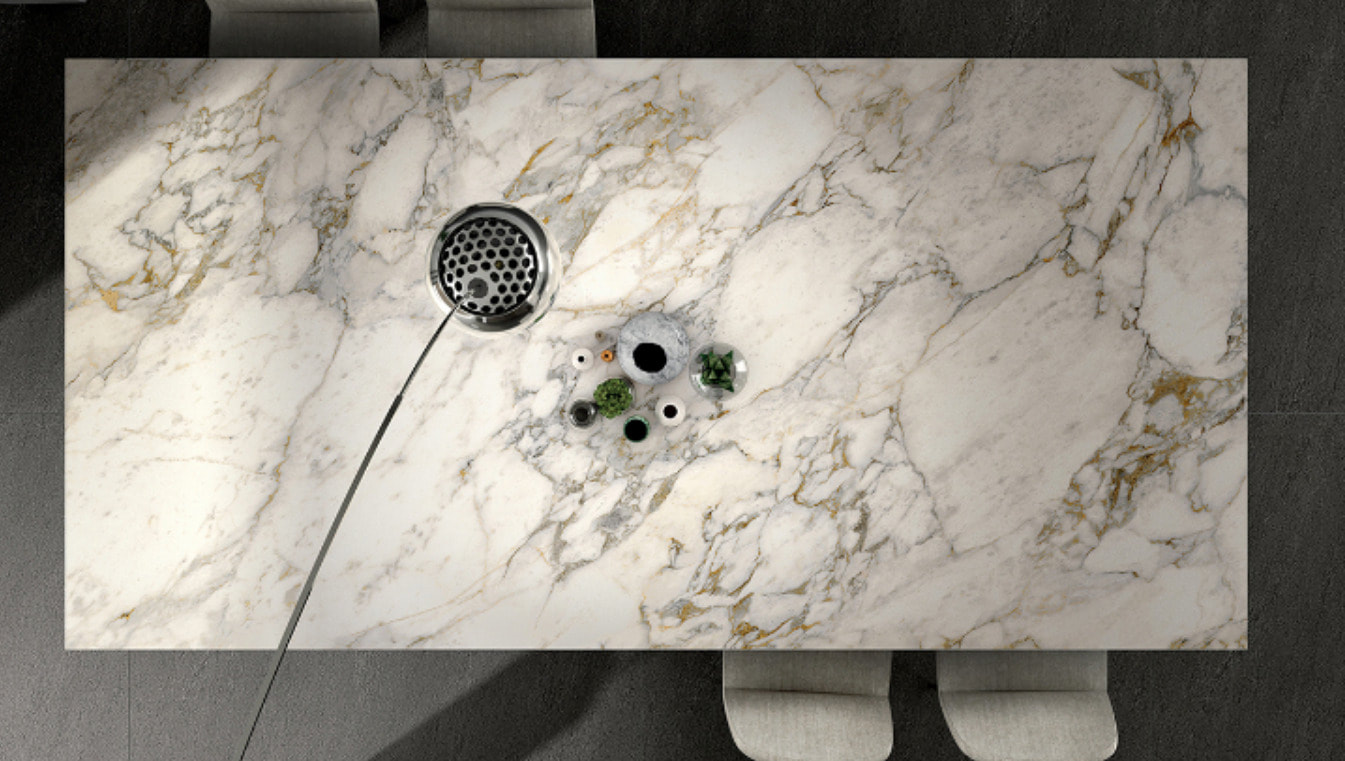 Imagine a tile that not only speaks of opulence but also redefines the very essence of elegance. The LL148 is a 600x1200mm Italian glazed porcelain tile, a mere 6.5mm thick, that effortlessly blends classic charm with modern sophistication. 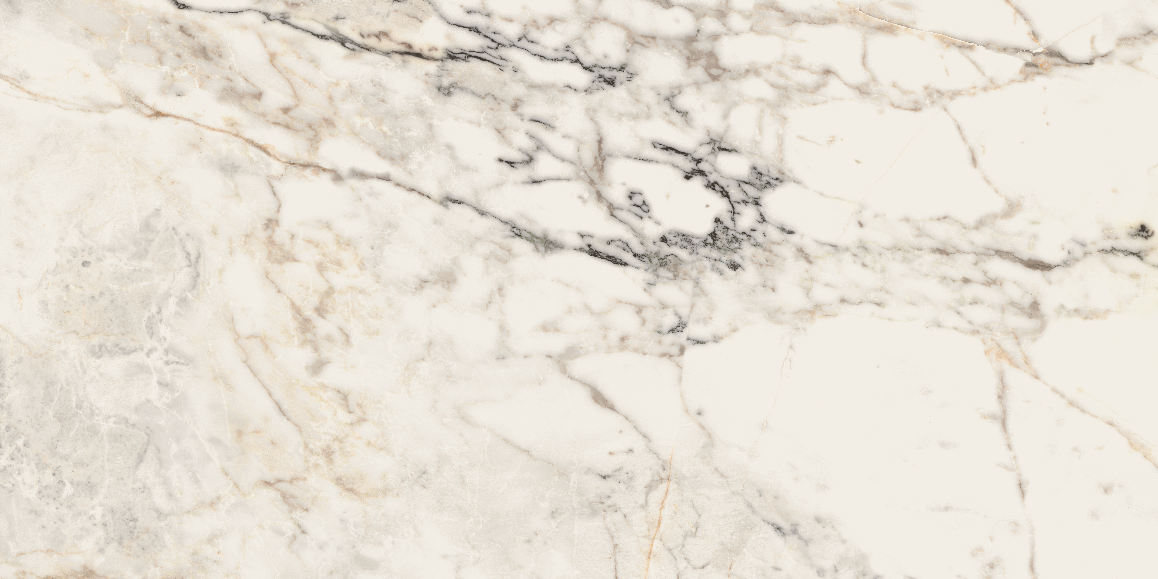 What Makes LL148 Special?
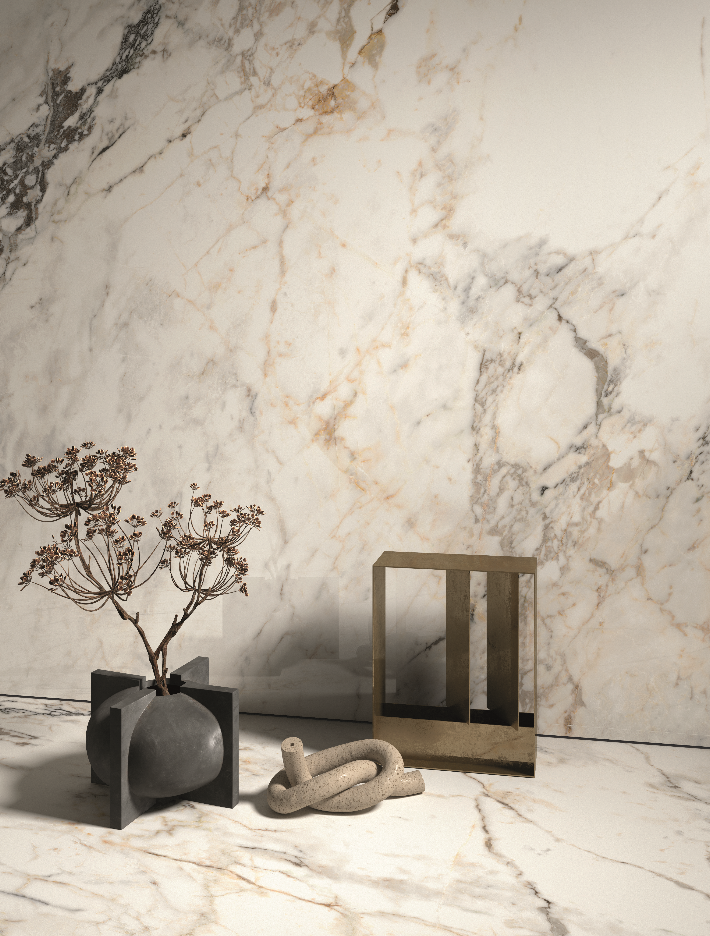 Crafted in Italy: Where Tradition Meets Innovation!Bring together the timeless appeal of marble with a contemporary twist. Traditional white, beige, grey, and black backgrounds meet unexpected bursts of surface color, creating stunning and high-impact effects that redefine your spaces. Be Bold, Be Different!The LL148 is not just a tile; it's a statement. It's about bringing a new dimension of elegance into your home, an expression of your unique taste for the extraordinary. 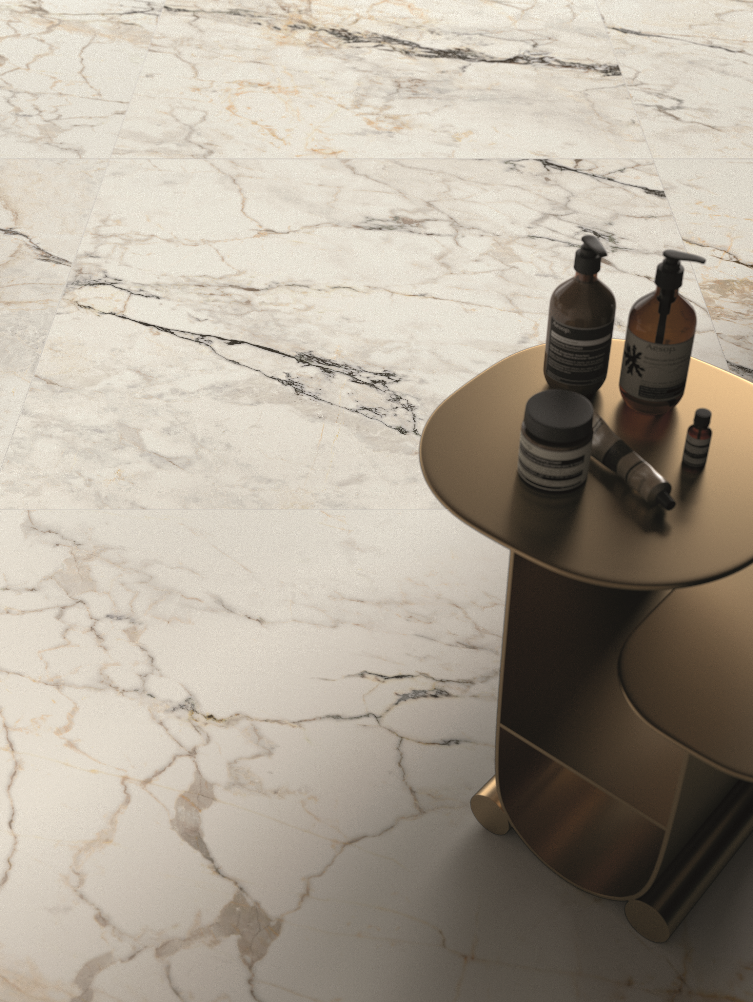 Italian EleganceReady to elevate your space? Visit our showroom or explore our online catalog to witness the beauty of LL148 firsthand.
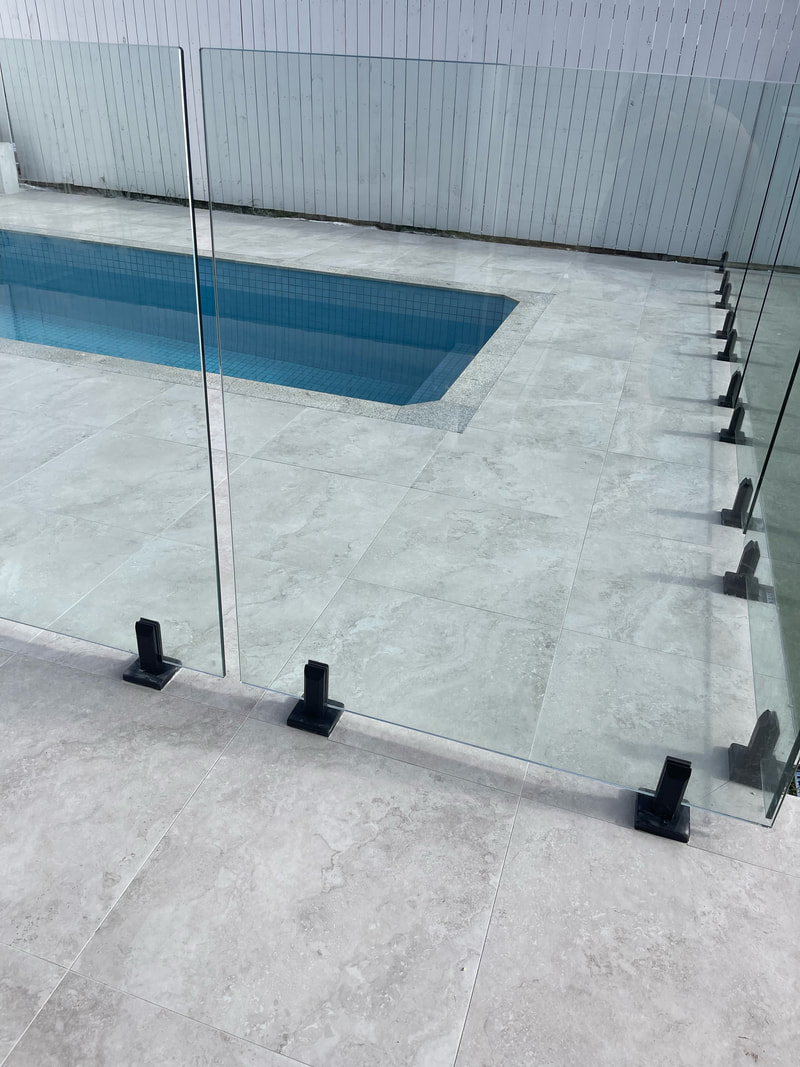
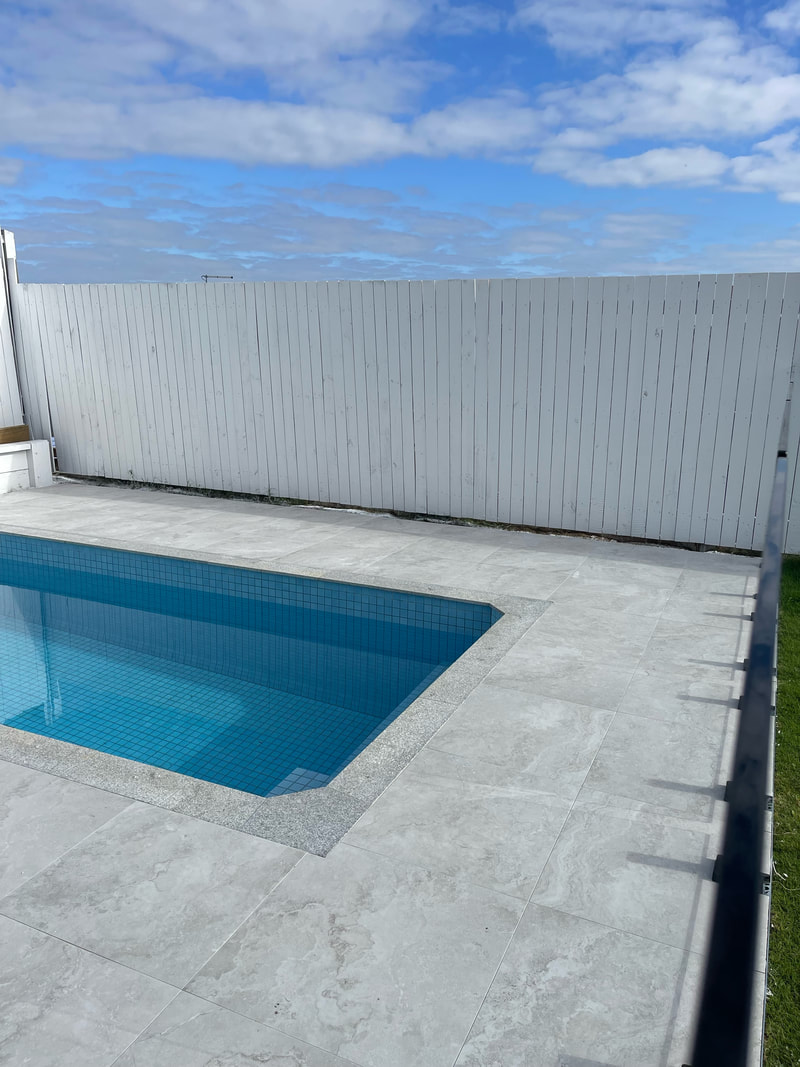
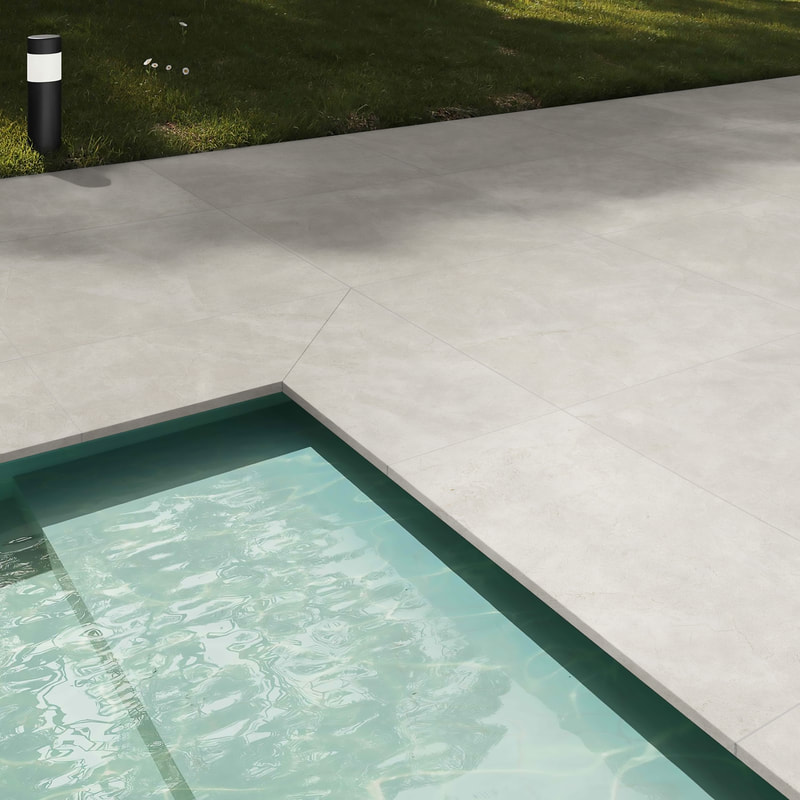
Be among the first to embrace this revolutionary tile and redefine luxury in your surroundings. When it comes to enhancing the beauty and functionality of your pool area, choosing the right pool coping material is crucial. Porcelain and natural stone are two popular options that offer distinct advantages. In this blog post, we'll explore the benefits of choosing porcelain pool coping tiles over natural stone, shedding light on why many homeowners and designers are making the switch to this versatile and durable material. 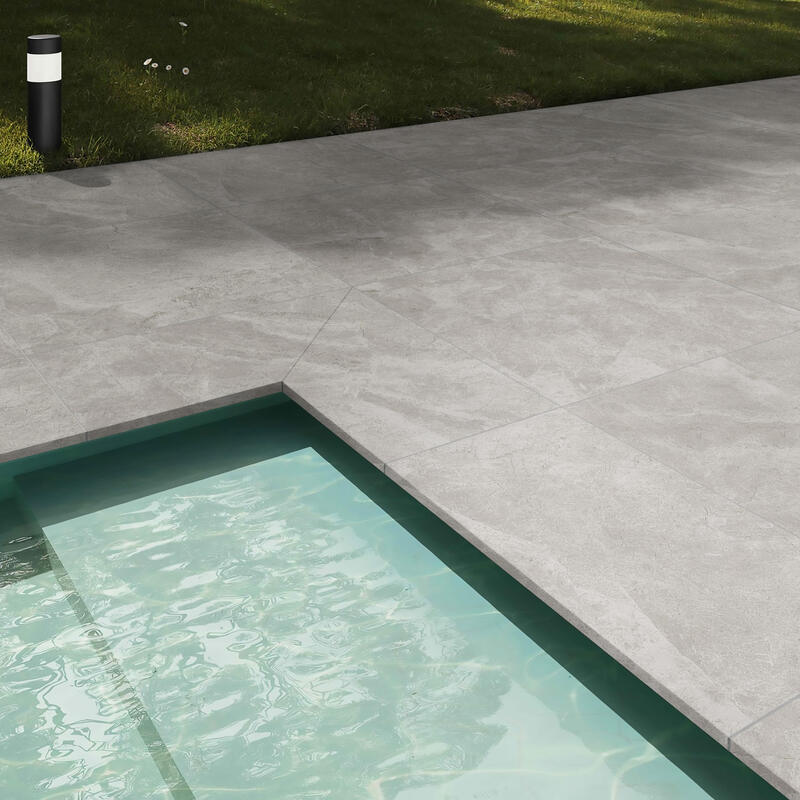 Durability and LongevityOne of the standout features of porcelain pool coping tiles is their exceptional durability. Porcelain is a dense, non-porous material that can withstand harsh outdoor conditions, including exposure to sunlight, pool chemicals, and freeze-thaw cycles. Unlike natural stone, porcelain does not require sealing, making it a low-maintenance choice that will maintain its aesthetics for years to come. Slip Resistance
Versatility in DesignPorcelain tiles come in a wide variety of colours, patterns, and finishes, allowing for endless design possibilities. Whether you prefer a modern, sleek look or a more traditional and rustic appearance, you can find porcelain coping tiles that match your style. Additionally, they can mimic the look of natural stone, wood, or other materials while offering the advantages of porcelain. Ease of Maintenance
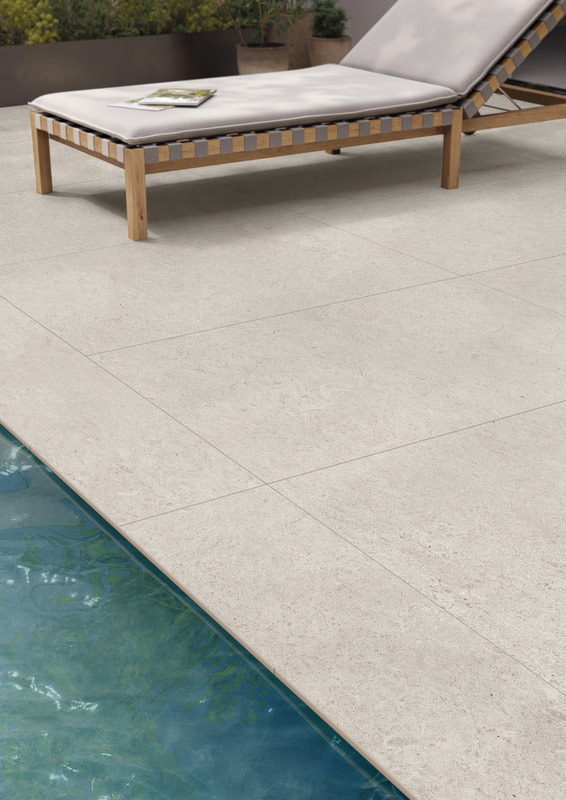
Cost-EffectivenessWhile natural stone can be exquisite, it often comes with a higher price tag. Porcelain pool coping tiles provide a cost-effective alternative that doesn't compromise on aesthetics or quality. You can achieve a luxurious look without breaking the bank. 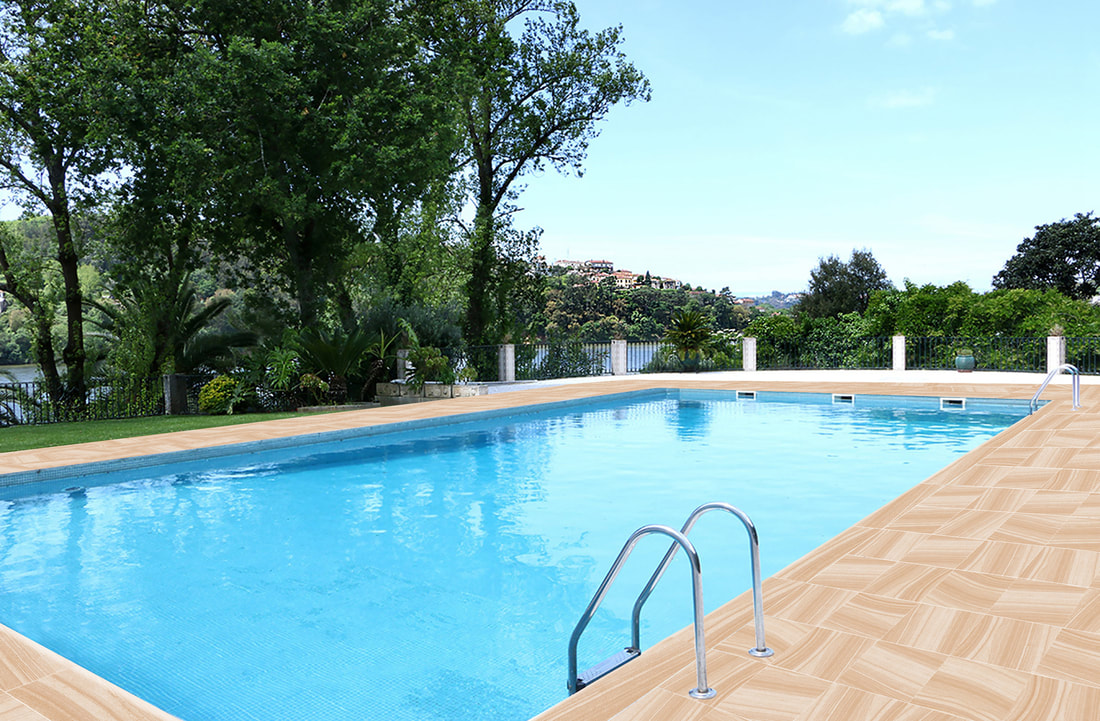 Resistance to FadingNatural stone coping can fade over time due to exposure to UV rays, resulting in a loss of its original charm. Porcelain tiles, however, maintain their color and sheen even under prolonged sun exposure, ensuring your pool area remains vibrant and inviting. Environmental FriendlinessPorcelain is an eco-friendly option as it is made from natural materials and has a longer lifespan, reducing the need for replacement and minimizing environmental impact. 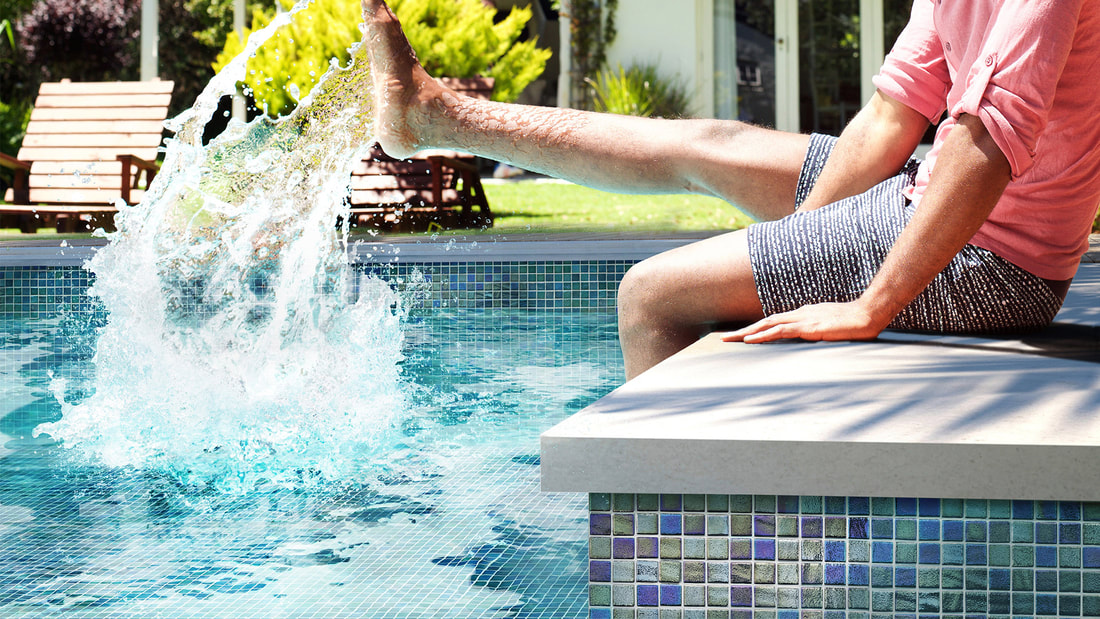 Porcelain pool coping tiles have emerged as a superior choice over natural stone for pool areas. Their durability, slip resistance, design versatility, low maintenance, cost-effectiveness, resistance to fading, and environmental friendliness make them an attractive option for homeowners and designers alike. By choosing porcelain, you're not just investing in the beauty of your pool area, but also in its long-term functionality and safety. Make the smart choice and enjoy your pool with porcelain pool coping tiles that offer the best of both worlds.
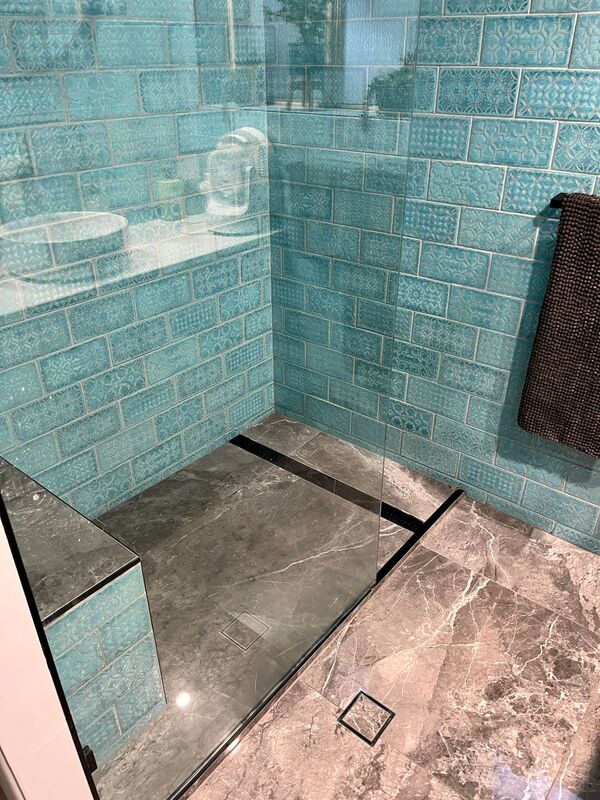
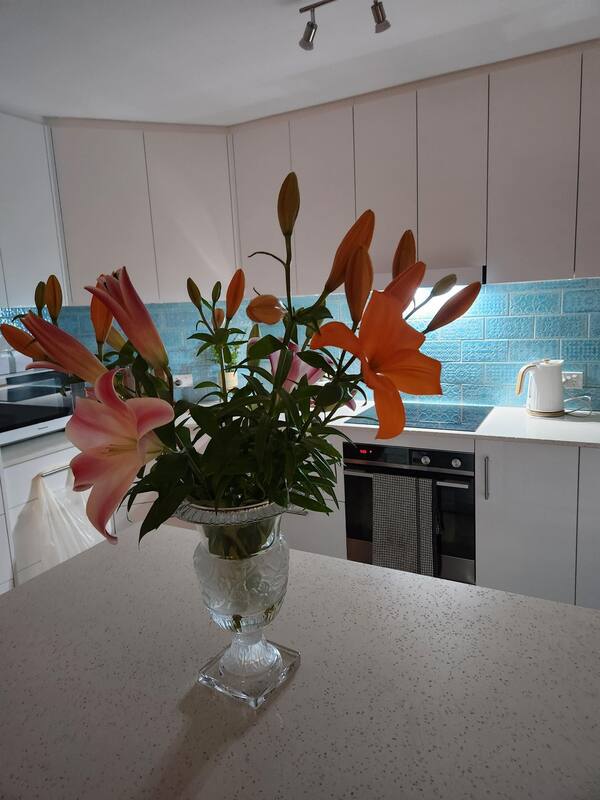
Revamp Your Home with XUN018 Decorative Subway Tiles: The Ultimate Coastal Chic Transformation!10/20/2023 If you're dreaming of adding a burst of refreshing colour and coastal charm to your living spaces, you've just stumbled upon the perfect solution – the stunning XUN018 Decorative Subway Tile by Nerang Tiles! With its captivating aqua blue hue, rustic variations, and unique Moroccan pattern design, this 112x224mm gloss finish tile with pressed edge sides is all you need to elevate your home decor game. 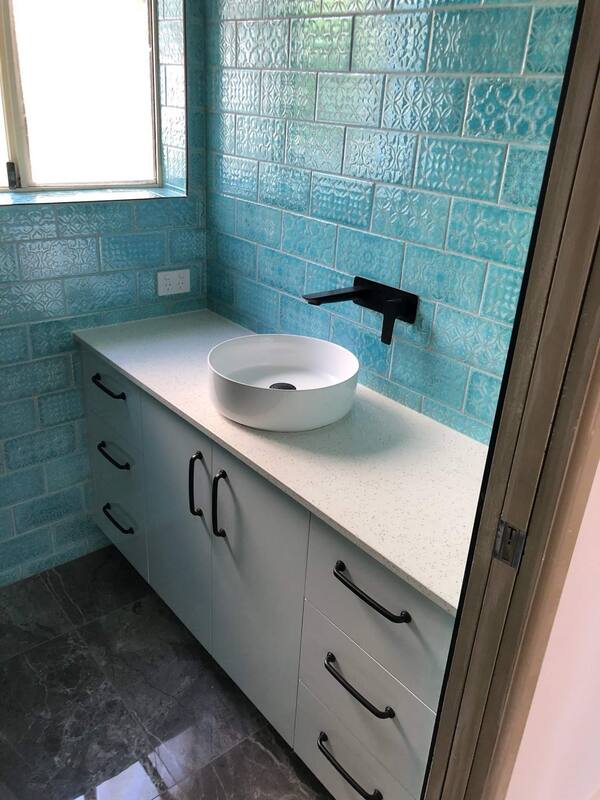 🌊 Dive into Coastal Paradise: 🌊Transforming your space into a coastal paradise has never been easier. The XUN018 Decorative Subway Tile effortlessly captures the essence of seaside serenity. It's the ideal choice for those yearning for a pop of color reminiscent of the ocean's waves.
🏆 Featured in Renovation Projects: 🏆The XUN018 Decorative Subway Tile has recently made waves in the world of home renovations. Homeowners and designers alike are singing its praises for its ability to breathe new life into spaces. Picture yourself stepping into a bathroom or kitchen adorned with these Moroccan-inspired gems. It's not just a renovation; it's a transformation!
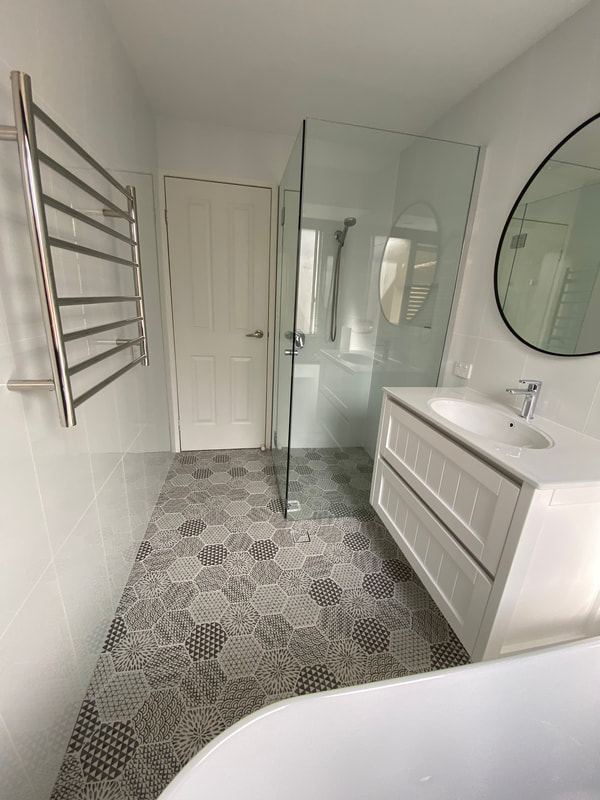
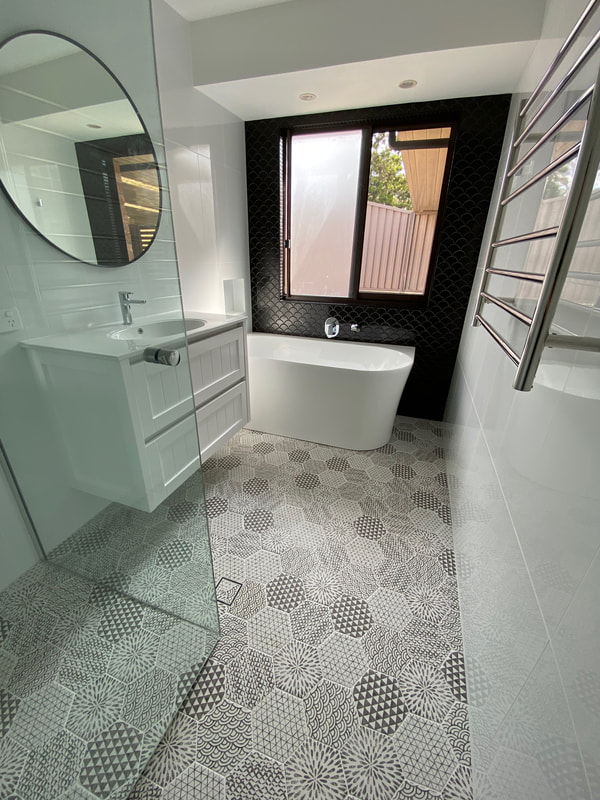
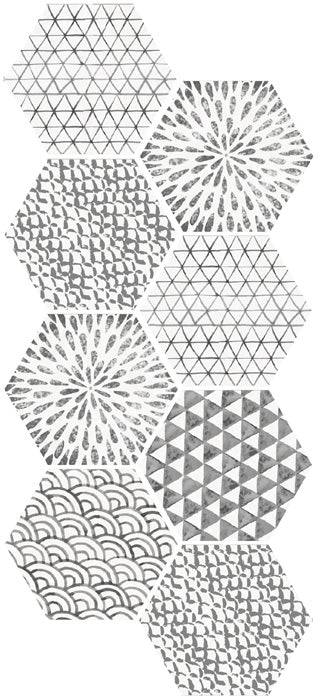
Say goodbye to bland interiors and hello to coastal chic with the XUN018 Decorative Subway Tile from Nerang Tiles. Your dream space is just a few tiles away. Dive into the coastal vibe and make a statement that everyone will envy! Ready to make your home the talk of the town? Discover the beauty of the XUN018 Decorative Subway Tile today, and start your transformation journey. Don't miss out on this opportunity to bring the coast to your doorstep. Your home deserves it! 🌊🏡💎 Visit Nerang Tiles to see the tiles in person today. 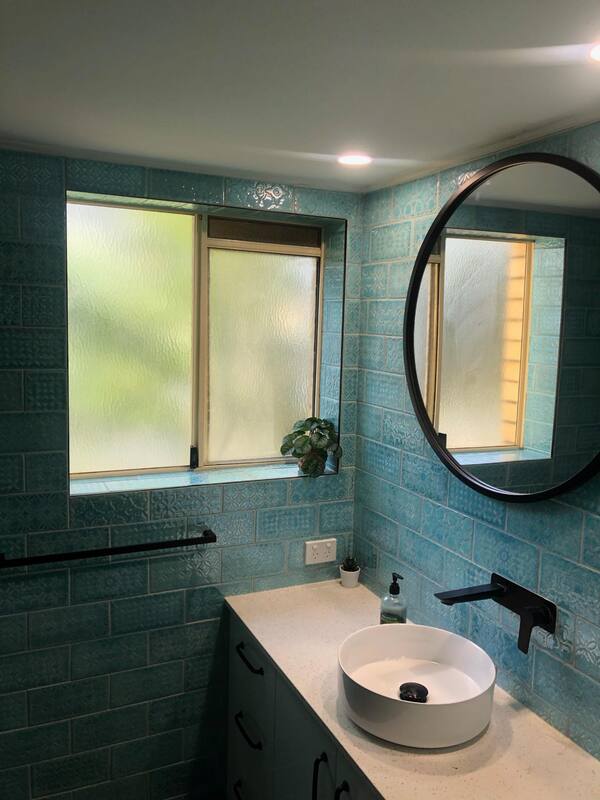 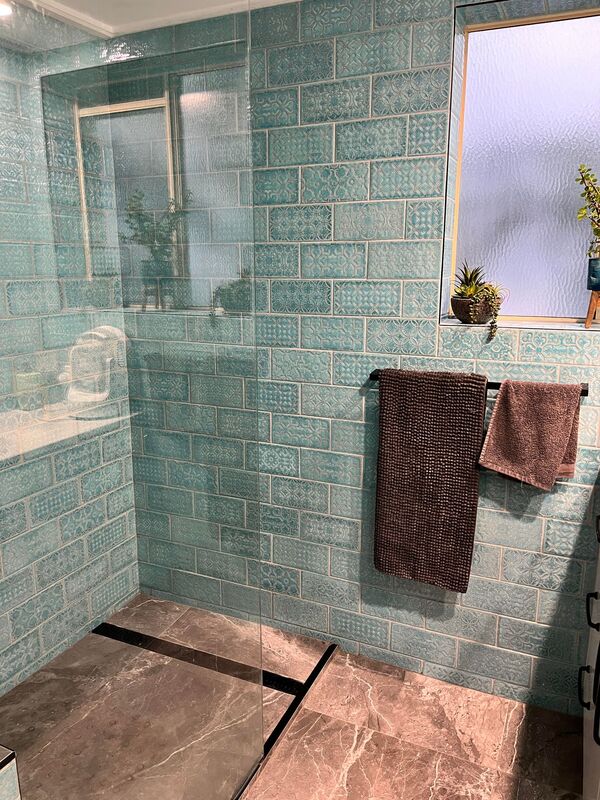 When it comes to bathroom renovations, the choice of tiles can make or break the overall design. The right tiles can transform a bland bathroom into a stylish and inviting space. One of the latest trends in bathroom tile design is the use of hexagon-shaped tiles. These tiles add a touch of uniqueness and sophistication to any bathroom renovation project. In this blog post, we will introduce you to the exquisite Nerang Tiles 4083 hexagon glazed porcelain tile, a versatile and visually stunning option for your bathroom upgrade.
Nerang Tiles 4083: The Tile That Redefines Elegance Nerang Tiles has long been a trusted name in the tile industry, known for offering high-quality products. The Nerang Tiles 4083 hexagon glazed porcelain tile is no exception. Let's delve into the details of this stunning tile.
Easy MaintenanceCleaning and maintaining your bathroom tiles should be hassle-free. The glazed surface of the Nerang Tiles 4083 hexagon tiles makes them easy to clean and maintain. A simple wipe-down will keep your bathroom looking pristine. VersatilityThese hexagon tiles are incredibly versatile. They can be used to create a variety of design patterns, from classic layouts to more intricate, custom designs. Whether you prefer a timeless look or a more contemporary style, the Nerang Tiles 4083 can adapt to your vision. 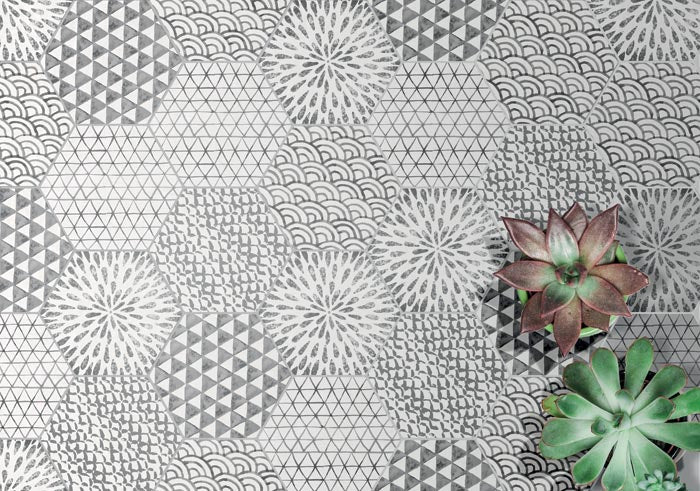 How to Incorporate Nerang Tiles 4083 into Your Bathroom Renovation Feature Wall: Create a stunning feature wall by covering one wall or a section of your bathroom with these hexagon tiles. The black and white patterns will draw attention and add a touch of luxury to your space. Flooring: Use the Nerang Tiles 4083 for your bathroom floor. The hexagon shape will add a unique dimension to the room, and the durable porcelain will stand up to the demands of daily use. Accent Areas: Use these tiles to create eye-catching accents, such as a border around your bathroom mirror, as a backsplash, or for niches and alcoves. Patterns and Combinations: Get creative with different patterns and combinations. The hexagon shape allows for intricate and artistic designs that will make your bathroom truly one-of-a-kind.
Are you on the hunt for the perfect flooring solution that not only oozes style but also cares for the planet and your family's health? Look no further, because the answer lies in the exquisite world of Porcelain Tiles, and one brand reigns supreme: Nerang Tiles! Prepare to be amazed by the eco-friendly and healthy benefits of these remarkable tiles. 🌟 🌱 Fact #1: Porcelain Tiles Are Earth's Best FriendLet's start with the planet-saving superpower of porcelain tiles. The majority of Porcelain Tile is a testament to sustainability, as they're crafted from natural materials, including clay and kaolin. These tiles require significantly less energy to manufacture compared to other flooring options, making them a green choice.
🍃 Fact #3: Hypoallergenic HeavenDo you suffer from allergies or asthma? Porcelain tiles are a blessing in disguise. They're hypoallergenic, which means they don't trap allergens, dust, or harmful particles. Breathe easier and enjoy a healthier indoor environment.  🌞 Fact #4: Sun-Kissed SavingsPorcelain tiles from Nerang are designed to reflect light and heat, reducing your reliance on artificial lighting and heating. This eco-friendly feature not only saves you money on your energy bills but also reduces your carbon footprint.
🌦️ Fact #6: Porcelain Tiles Outlast the RestInvesting in Porcelain Tiles is not just a short-term fix. They are incredibly durable, outlasting other flooring materials, which means you'll save money in the long run by avoiding frequent replacements. 🌺 Fact #7: Style Meets SubstanceLast but not least, Porcelain Tiles come in a stunning array of designs and finishes. Whether you prefer a modern, rustic, or classic look, you'll find the perfect fit for your home that complements your unique style.  🛒 Get Ready to Transform Your Home!If you're ready to make a bold style statement, protect the planet, and safeguard your family's health, then Porcelain Tiles are your ultimate flooring solution. They bring eco-friendly elegance and timeless beauty to your home, all while being a healthy choice for your loved ones.
Don't miss this opportunity to revolutionize your living space with eco-friendly and stylish porcelain tiles. Visit Nerang Tiles' to see our exquisite collection and embrace a healthier, greener lifestyle! 🏡🍃🌞 Tile Trends 2023: Nerang Tiles Leading the Pack – Your Ultimate Guide to Stay Ahead of the Curve9/29/2023 Hey there, fellow trendsetters and tile aficionados! 🌟 Are you ready to dive into the exciting world of tile trends for 2023? Well, hold onto your seats because Nerang Tiles is about to take you on a jaw-dropping journey through the hottest trends in the tile industry. Get ready to revamp your space and make your home the epitome of style with our exclusive insights! 🔥 Terrazzo Triumph 🔥 Picture this: Luxurious floors that look like a work of art. That's the magic of terrazzo tiles, and they're making a massive comeback in 2023! Nerang Tiles offers an exquisite collection of terrazzo-inspired tiles that will instantly elevate your space. Discover how you can bring this timeless trend into your home and create a masterpiece beneath your feet. 🌊 Oceanic Opulence 🌊 Escape to a coastal paradise without leaving your home! The Oceanic Opulence trend is all about bringing the serenity of the sea into your living spaces. Dive into our ocean-inspired tile options that capture the beauty of water, waves, and tranquility. Nerang Tiles has the perfect tiles to transform your bathroom, kitchen, or living room into a seaside oasis. 🌸 Botanical Bliss 🌸 Nature is calling, and we're answering with the Botanical Bliss trend. Embrace the beauty of the great outdoors with tiles that mimic the textures and colours of lush forests and exotic jungles. Our curated selection of botanical-inspired tiles will infuse your interiors with a sense of calm and connection to nature. ✨ Metallic Marvels ✨Shine bright like a diamond! Metallic Marvels are taking the tile world by storm, and Nerang Tiles is at the forefront of this trend. Discover how you can add a touch of glamour to your space with our stunning metallic finish tiles. From shimmering gold to sleek silver, we've got the perfect tiles to make your interiors glisten. 🎨 Artistic Expression 🎨 Turn your home into a canvas with the Artistic Expression trend. Unleash your creativity with Nerang Tiles' collection of artistic and handcrafted tiles. These unique pieces are a testament to the beauty of craftsmanship and will allow you to express your individuality in every room of your home. But wait, there's more! Nerang Tiles isn't just about tiles; it's about transforming your living spaces into works of art. With our expert guidance and the hottest trends of 2023, you'll be the envy of your friends and neighbors.
Ready to make your home the talk of the town? Dive headfirst into the world of tile trends with Nerang Tiles and watch as your space transforms into a stylish sanctuary. Don't miss out on these incredible trends – your dream home is just a few clicks away! 💎🏡 Remember, the future of interior design is here, and Nerang Tiles is leading the pack. Stay ahead of the curve, and let your creativity run wild! 🚀 Are you on the hunt for a stunning tile that effortlessly combines style and safety for both indoor and outdoor spaces? Look no further! Nerang Tiles presents the Alpine Slate 600x600mm Glazed Porcelain Tile, the ultimate solution for your flooring needs. Discover how this tile not only elevates your space's aesthetics but also ensures the safety you need with its impressive P4 slip rating. The Beauty of Alpine Slate: Imagine the rustic charm of slate, perfectly captured in a versatile 600x600mm porcelain tile. The Alpine Slate design offers a timeless, natural look that complements any setting, from contemporary interiors to classic outdoor spaces. Its rich textures and earthy tones add warmth and character to your home or commercial project. 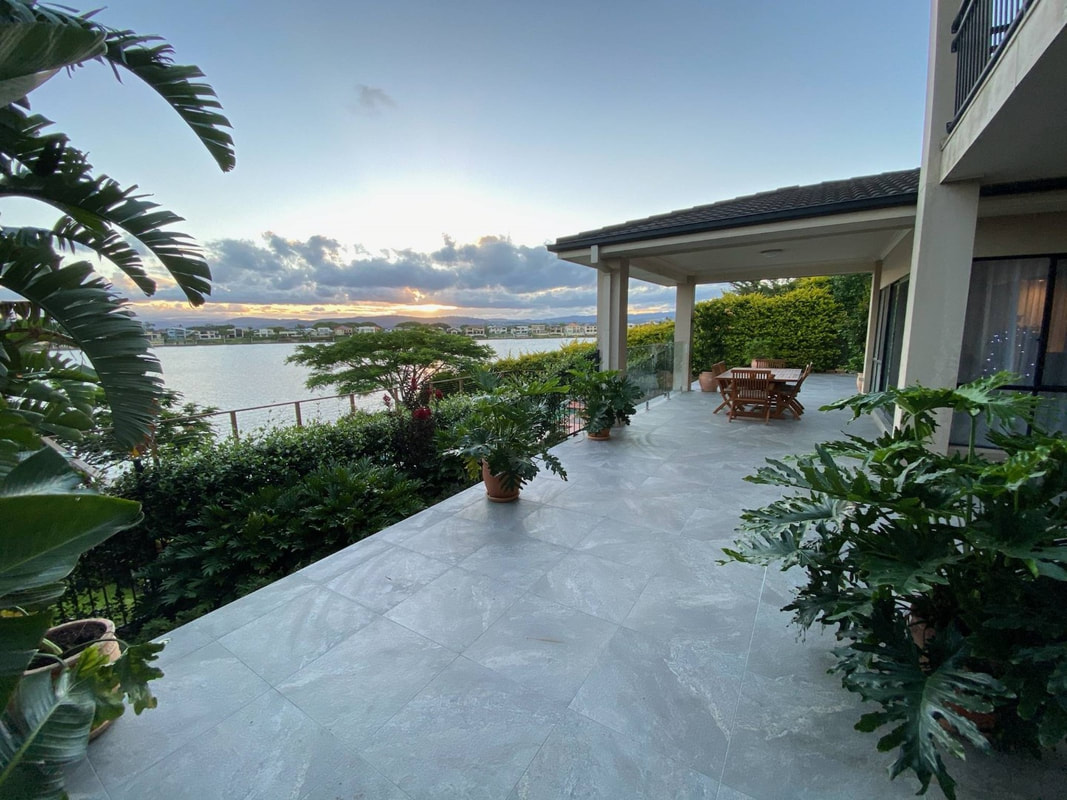 Safety First with P4 Slip Rating: Safety is paramount, especially when it comes to flooring choices. The Alpine Slate tile boasts a P4 slip rating, making it an excellent choice for areas where slip resistance is crucial. Whether it's a wet kitchen floor or an outdoor patio near the pool, you can walk with confidence, knowing that your space is not only stylish but also safe.
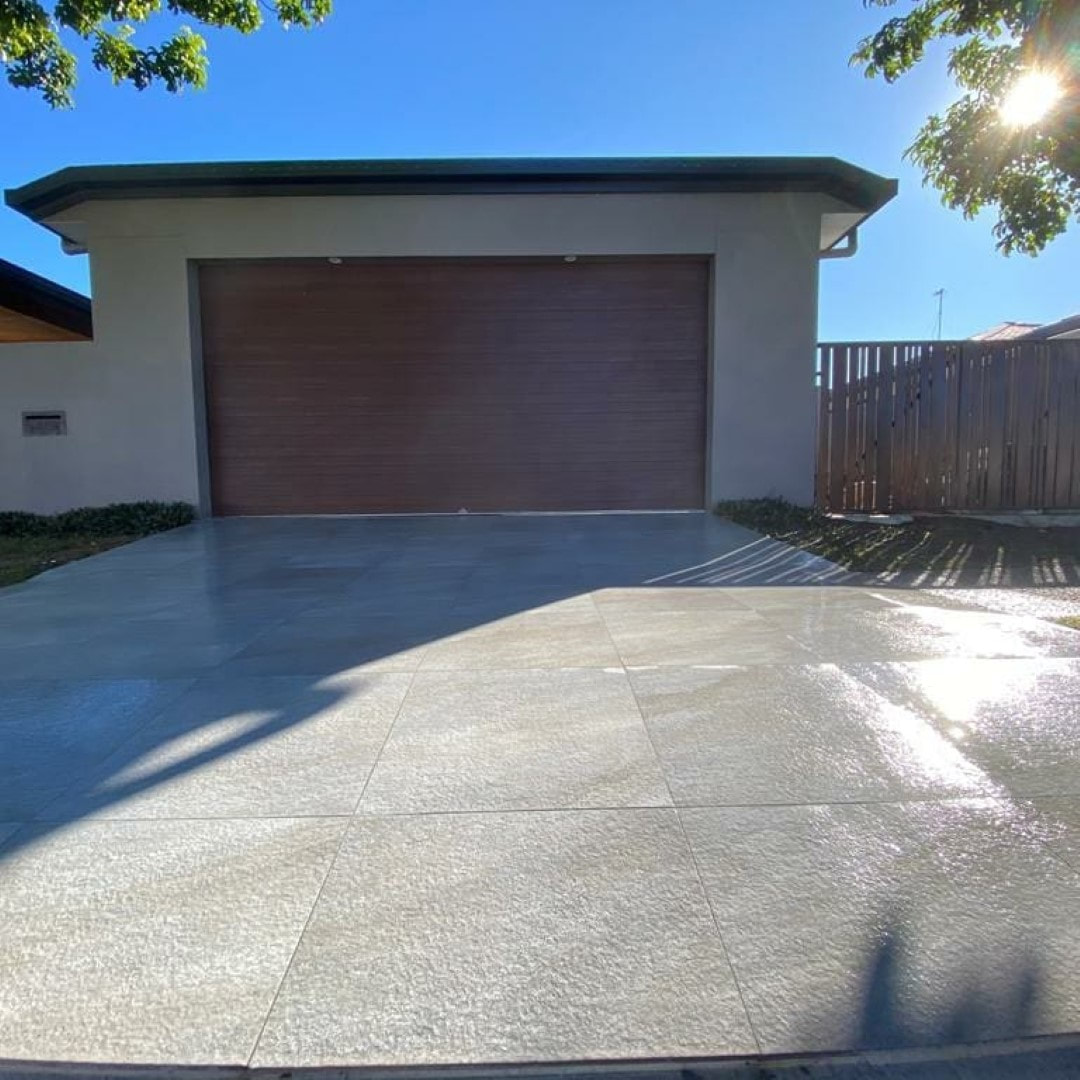
Easy Maintenance: Say goodbye to high-maintenance flooring! The glazed porcelain surface of the Alpine Slate tile is easy to clean and maintain, so you can spend more time enjoying your space and less time worrying about upkeep. 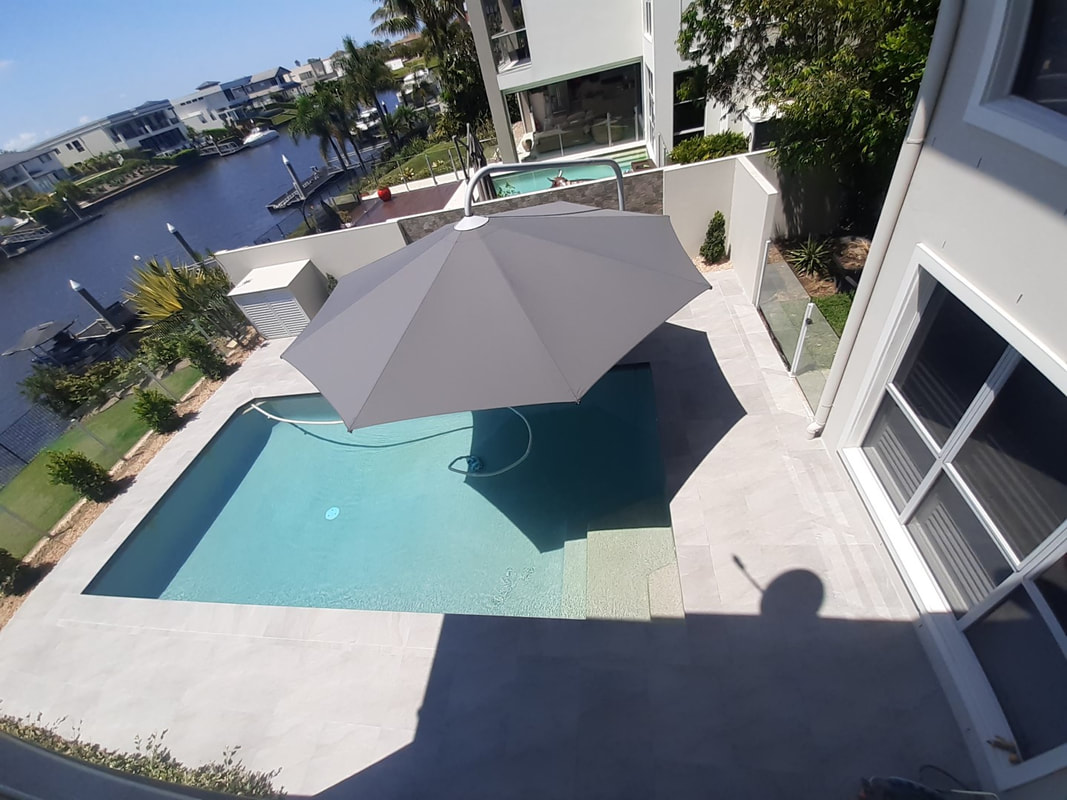 The Nerang Tiles Alpine Slate 600x600mm Glazed Porcelain Tile is more than just a flooring solution; it's a statement of style and safety. With its P4 slip rating, you can have peace of mind while enjoying the beauty of nature-inspired design. Don't miss the opportunity to elevate your space with this exceptional tile. 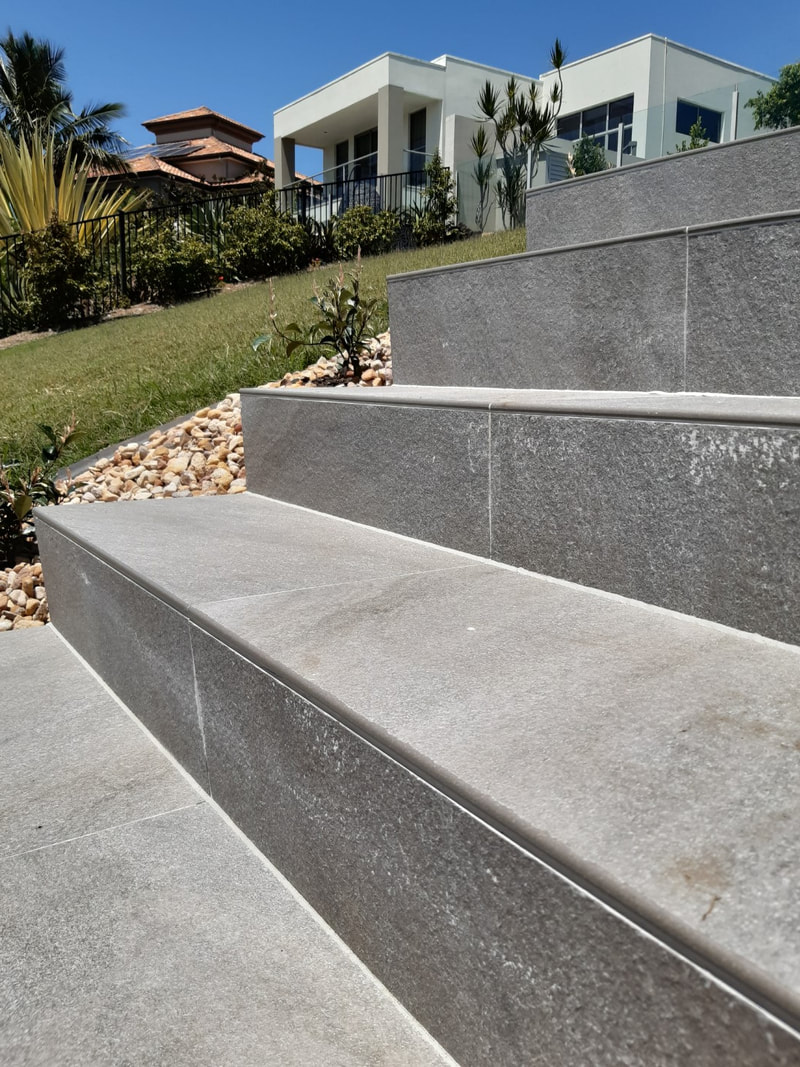 Are you ready to take your space from drab to fab? Look no further, because we've got the inside scoop on the Nerang Tiles LL147 Travertine Look Tile Range! Say goodbye to boring floors and hello to stunning interiors and outdoor spaces that'll make your neighbours green with envy. In this article, we're unveiling the magic of these tiles, available in both 600x600 and 300x600 sizes, with the exclusive Inside Out SmoothGrip finish. Get ready to discover the game-changer in home design! 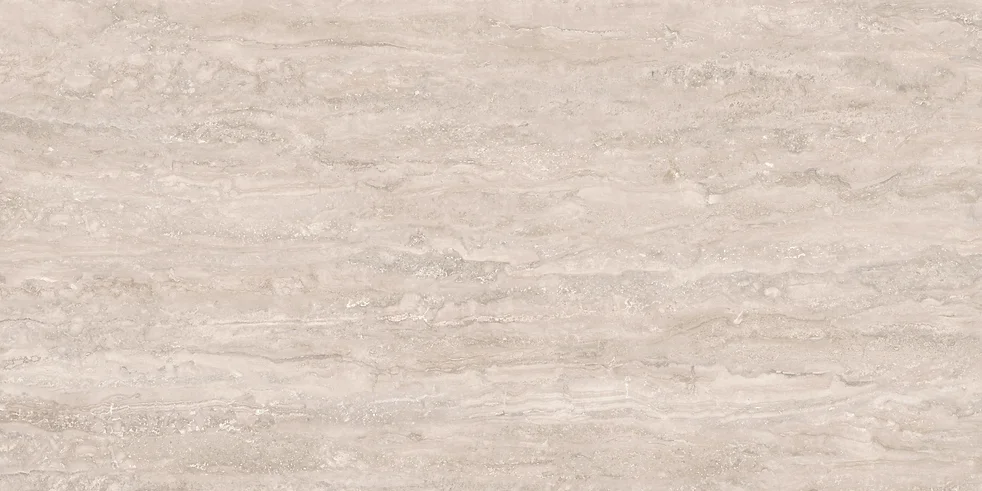 Astonishing Travertine AestheticsPrepare to be amazed by the uncanny resemblance of Nerang Tiles LL147 to natural travertine. These glazed porcelain tiles feature a stunning vein-cut design that'll leave your guests wondering if you've smuggled in a piece of Italy. With these tiles, you can achieve that timeless, sophisticated look without breaking the bank. 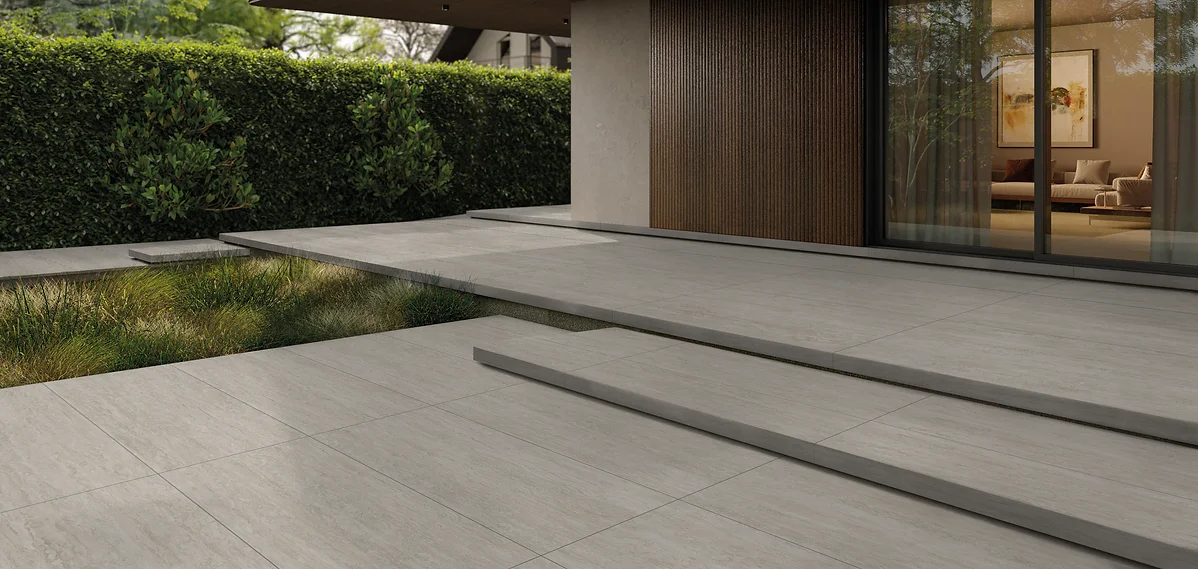 Versatility That's Second to NoneWhat sets these tiles apart is their versatility. You can use them indoors or outdoors, and they're not just limited to your floors. These tiles are perfect for feature walls, bathrooms, kitchens, and even pool surrounds! Create a seamless flow from your living room to your patio, or give your pool area a touch of elegance that'll have you lounging in style. 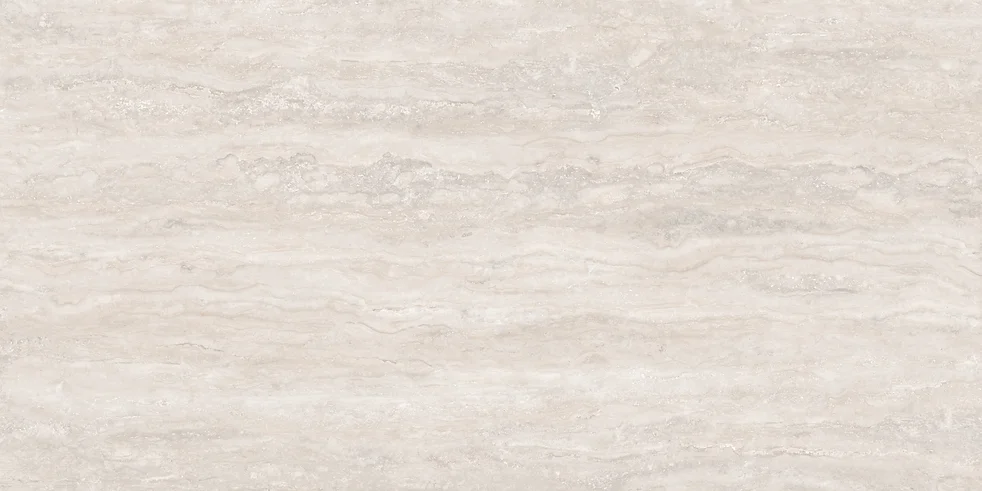 Safety Meets Style with SmoothGripWe get it – safety is paramount, especially around pools. That's where the Inside Out SmoothGrip finish shines. It offers a secure grip even in wet conditions, ensuring your family and friends can splash around without a worry in the world. But don't let the safety fool you; these tiles don't compromise on style one bit. Easy Maintenance for a Hassle-Free LifeNobody wants to spend hours scrubbing and cleaning. With Nerang Tiles LL147, maintenance is a breeze. Just a quick wipe-down, and you're good to go. Spend less time cleaning and more time enjoying your beautiful space. 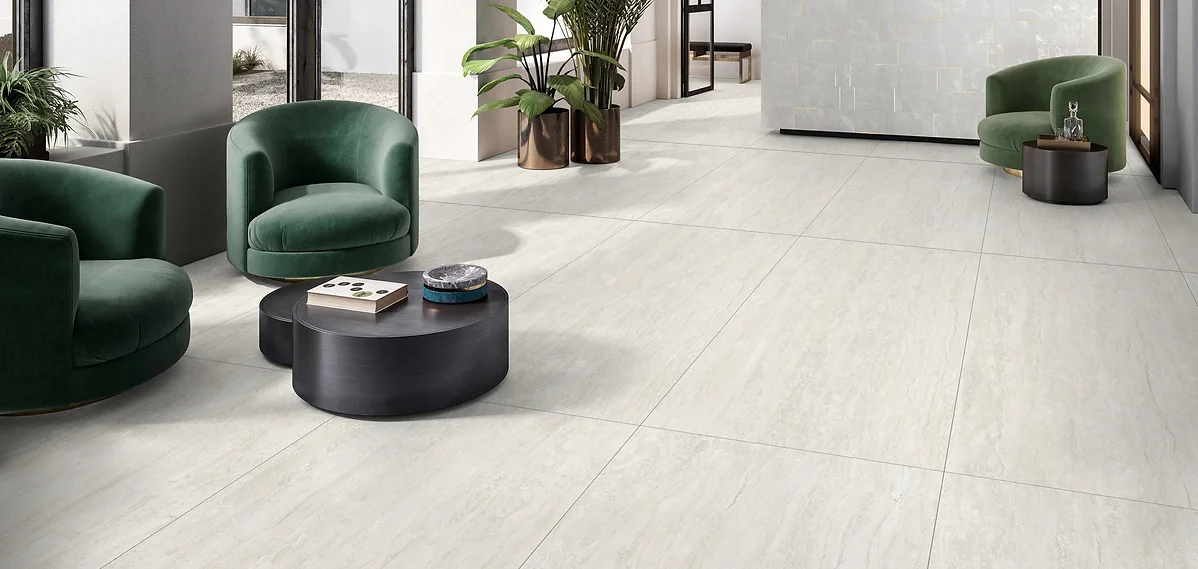 The Affordable Elegance You DeserveRenovating your space shouldn't mean breaking the bank. Nerang Tiles LL147 offers you affordable elegance. Get that high-end look without the high-end price tag. You'll be amazed at how a simple tile can transform your home. 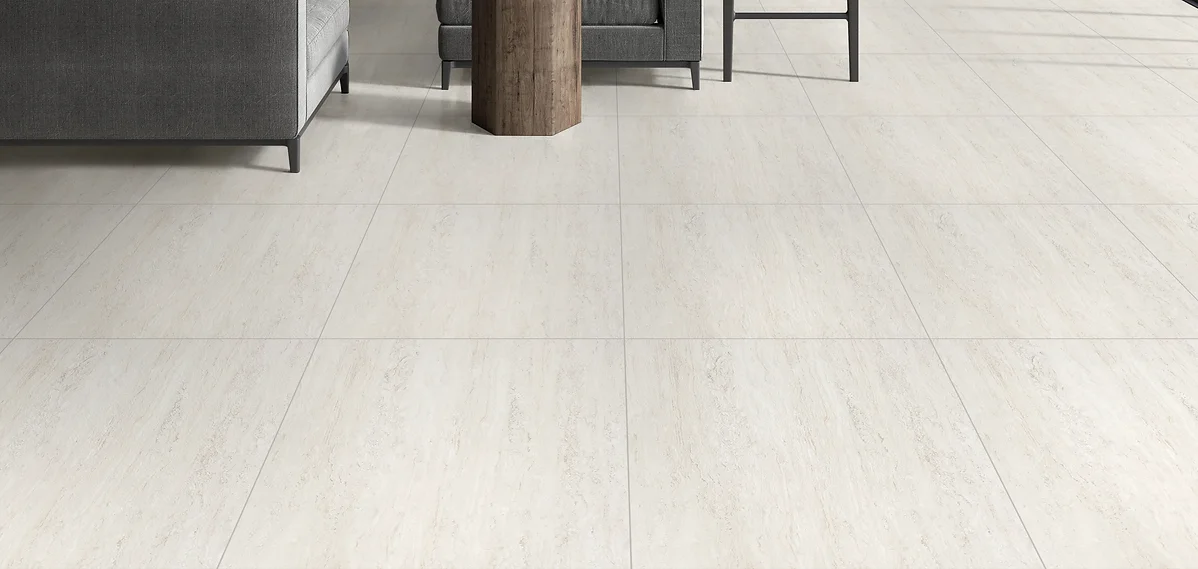 Elevate Your Space with Nerang Tiles LL147The Nerang Tiles LL147 Travertine Look Tile Range is a game-changer in home design. With its stunning aesthetics, unbeatable versatility, and safety-focused SmoothGrip finish, it's the perfect choice for your indoor and outdoor spaces. So, why wait? Head over to our showroom and see these beauties for yourself. Your dream space is just a few tiles away. Don't miss out on the chance to elevate your home with Nerang Tiles LL147 – the ultimate choice for style, safety, and affordability!
G'day, pool enthusiasts! If you're looking to elevate the aesthetics and safety of your pool surrounds, you've come to the right place. We're thrilled to introduce you to the game-changer in poolside elegance: the 5039-LGT 600x600mm Smooth Grip Travertine Look Glazed Porcelain Tile. Say goodbye to boring and slippery pool decks, and dive into the world of style, durability, and safety brought to you by Nerang Tiles. 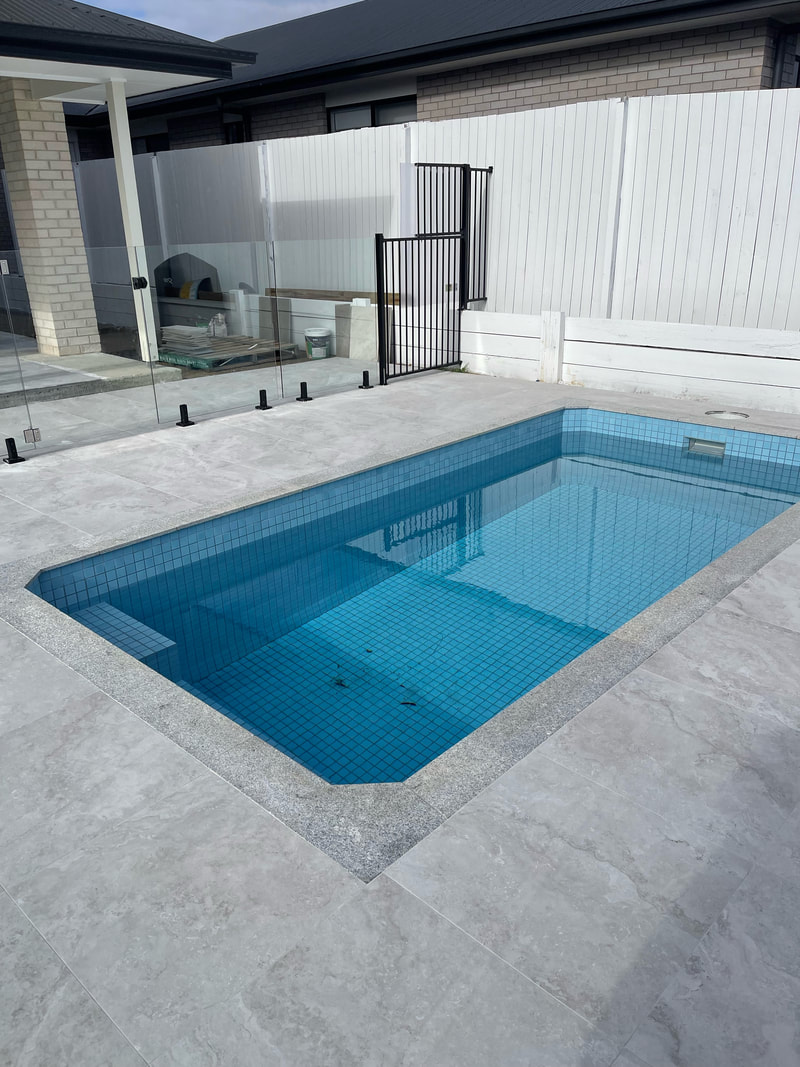 Timeless EleganceAussies love their pools, and it's no secret that the pool surrounds play a vital role in the overall experience. Enter the 5039-LGT tile – a true game-changer in the world of poolside aesthetics. This porcelain tile offers the timeless beauty of natural travertine, combined with the durability and slip-resistant features you need for a safe and stylish poolside oasis. Key Features:
Why Choose Nerang Tiles? Nerang Tiles is your go-to destination for top-quality tiles in Australia. With over 40 years in the business, we've built a reputation for excellence in providing our customers with the best in tile innovation and design. 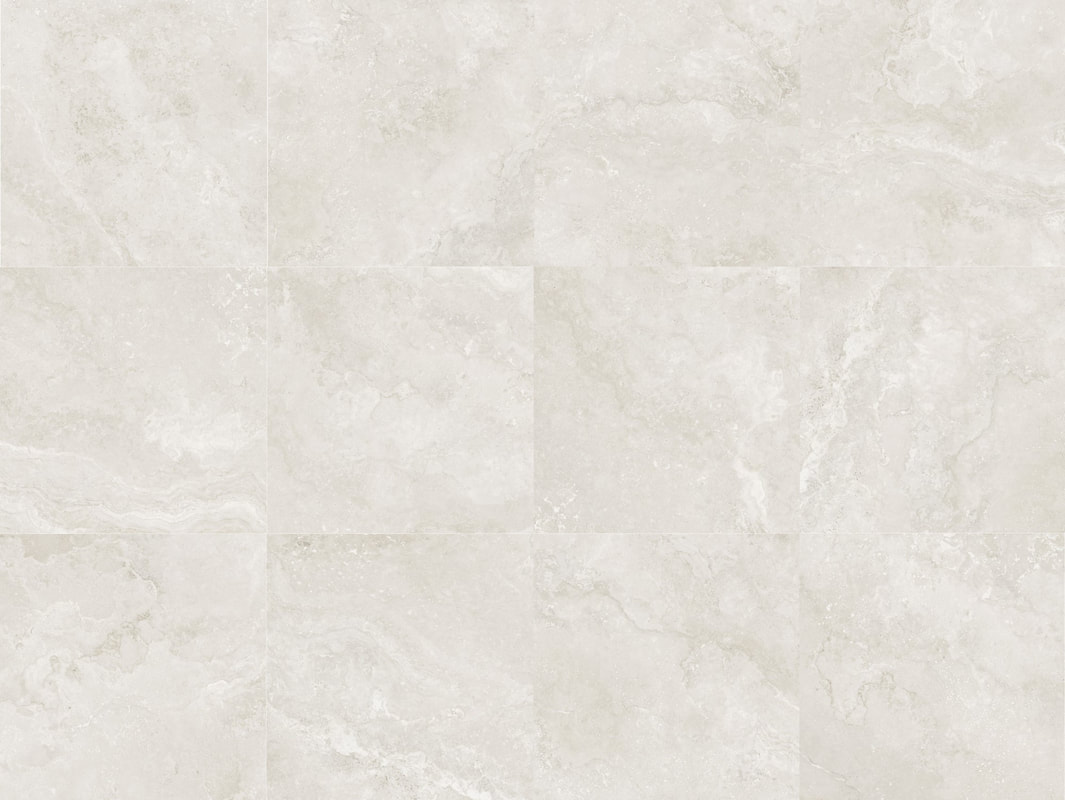 Our Commitment to Excellence:
Elevate your poolside experience with the 5039-LGT 600x600mm Smooth Grip Travertine Look Glazed Porcelain Tile from Nerang Tiles. Say goodbye to slippery surfaces and hello to timeless elegance and safety. Trust in our decades of expertise to transform your outdoor space into a stylish oasis that will leave your guests in awe.
Ready to take the plunge? Visit our showroom or explore our website to discover more tile options and embark on your journey to a more beautiful and safe pool area. Choose Nerang Tiles – where style meets substance. Don't miss out on the opportunity to turn your pool surrounds into a true masterpiece. Contact us today and let's make your pool dreams a reality! Elevate Your Gold Coast Pool with Stunning Mosaic Tiles from Nerang TilesDiving into the refreshing waters of your own backyard swimming pool is the ultimate dream for many Gold Coast homeowners. If you're embarking on the journey of building a pool, don't miss out on the opportunity to make it truly exceptional. At Nerang Tiles, we're excited to introduce you to the captivating world of swimming pool mosaic tiles that can transform your aquatic haven into a work of art.  Unveiling the Beauty of Mosaic Tiles: Mosaic tiles are the epitome of elegance and creativity when it comes to pool design. Their intricate patterns and vibrant colours can turn an ordinary pool into a breathtaking masterpiece. Whether you are envisioning a serene oasis or a vibrant aquatic playground, Nerang Tiles offers a wide range of mosaic tiles that cater to every aesthetic preference.
Endless Design Possibilities: Your pool is a canvas, and mosaic tiles are your palette. Let your imagination run wild as you explore a myriad of design possibilities. Create mesmerising gradients, depict aquatic scenes, or craft a mosaic masterpiece that complements your home's architecture. Our experts at Nerang Tiles are here to guide you through the design process, helping you select the perfect tiles to bring your vision to life. Tailored to Gold Coast Sophistication: We understand that Gold Coast homeowners have a distinct taste for sophistication and luxury. Our carefully curated collection of swimming pool mosaic tiles reflects the unique aesthetic of the region. From shimmering blues that mirror the ocean's hues to warm earthy tones that harmonise with the surrounding landscape, we have the tiles that resonate with Gold Coast style. 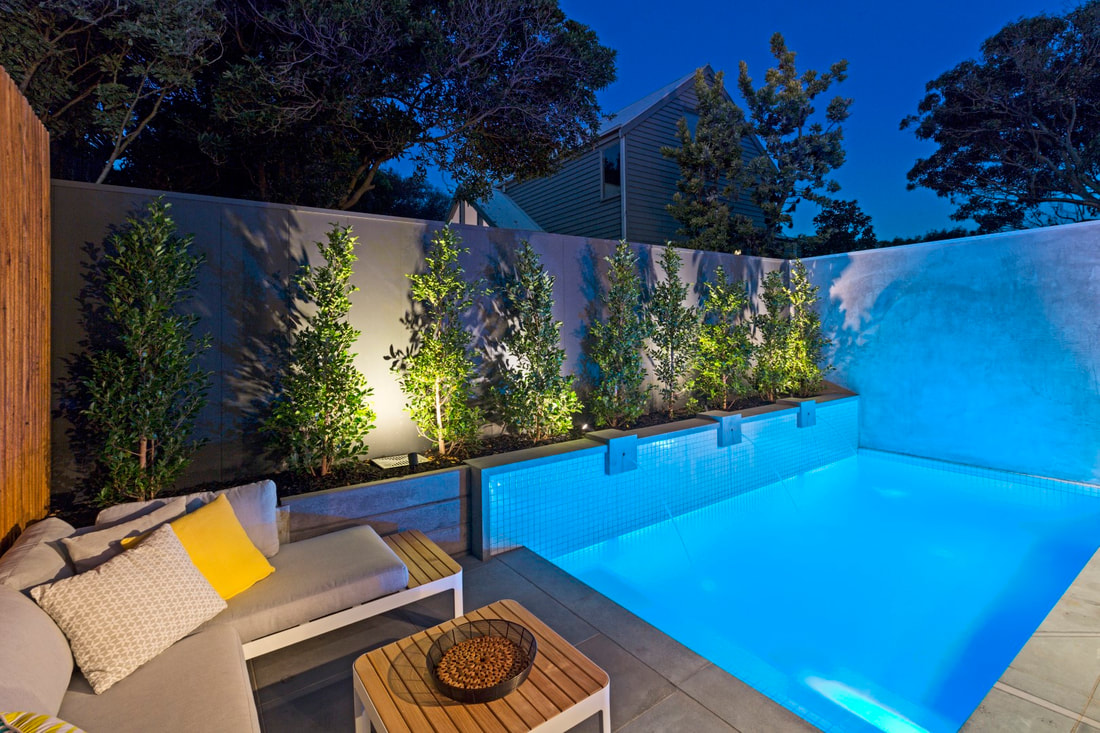 Customer Satisfaction Guaranteed: At Nerang Tiles, your satisfaction is our priority. We take pride in offering not only the finest mosaic tiles but also exceptional customer service. Our knowledgeable staff is here to assist you at every step, from choosing the right tiles to ensuring a seamless installation process. We are committed to making your pool building experience delightful and rewarding. 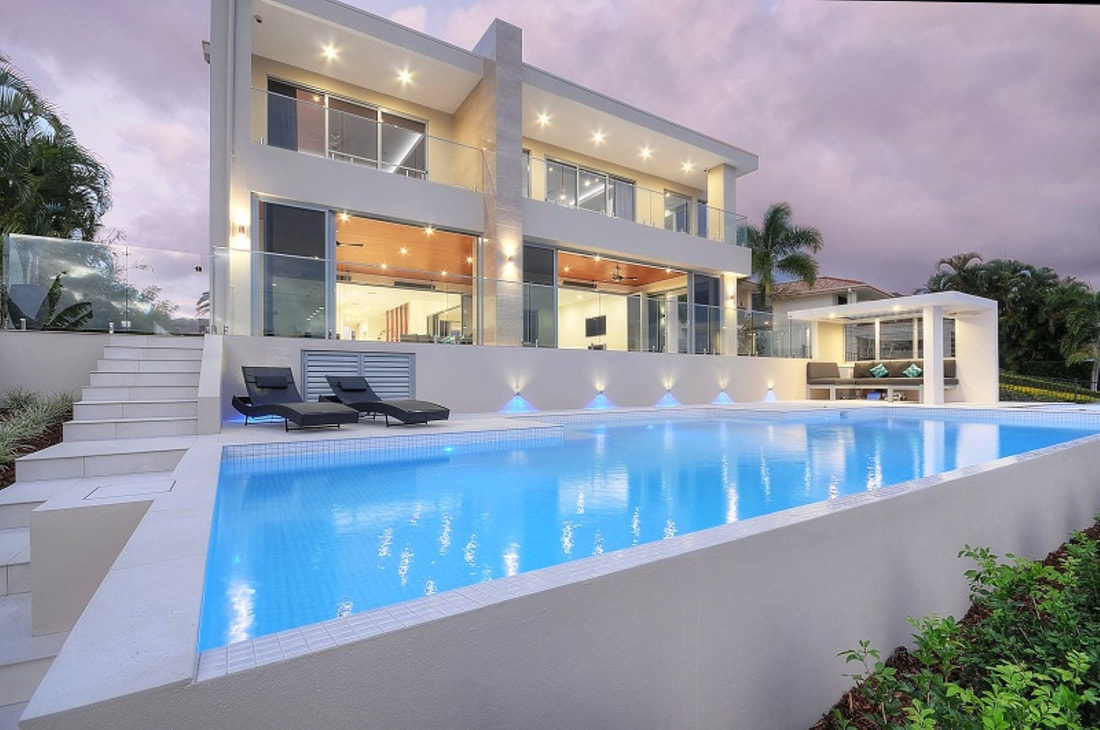 Elevate your Gold Coast home with the allure of mosaic adorned swimming pools. Nerang Tiles invites you to explore our collection of mosaic tiles that redefine pool design. Let your creativity flow and transform your pool into a stunning masterpiece that reflects your personality and style. Contact us today to embark on this exciting journey and turn your pool dreams into a vibrant reality.
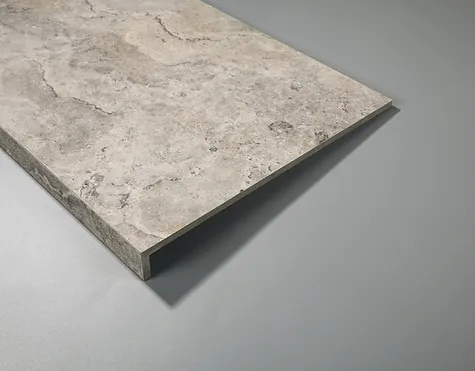
When it comes to transforming your swimming pool into a stunning oasis, every detail matters. One of the key elements that can truly elevate your pool design is the choice of tiles. At Nerang Tiles, we take pride in offering a remarkable selection of bullnose glazed porcelain tiles with a mitred edge apron drop edge, designed to bring both beauty and functionality to your poolside paradise.
Dive into Durability: Porcelain Tiles for LongevityWhen choosing tiles for your swimming pool, durability is paramount. Our mitred edge glazed porcelain tiles are not only exquisite but also built to withstand the test of time. The inherent strength of porcelain makes these tiles highly resistant to water, fading, and wear, ensuring that your pool area remains as vibrant and captivating as the day it was installed. A Spectrum of Style: Tailored for Your AestheticAt Nerang Tiles, we understand that every pool design is a unique reflection of your personal style. That's why our collection of mitred edge glazed porcelain tiles comes in an array of colours, textures, and patterns, allowing you to unleash your creativity and craft a poolside masterpiece that suits your taste and vision. Whether you prefer a classic look or a contemporary vibe, our tiles are the canvas upon which your design dreams come to life. Nerang Tiles: Your Partner in Pool PerfectionAs the leading tile supply business on the Gold Coast, Nerang Tiles is committed to delivering exceptional products that exceed your expectations. Our mitred edge glazed porcelain tiles with apron drop edge are a testament to our dedication to quality and innovation. When you choose Nerang Tiles, you're not just investing in tiles; you're investing in a poolside experience that encapsulates elegance, durability, and timeless beauty. 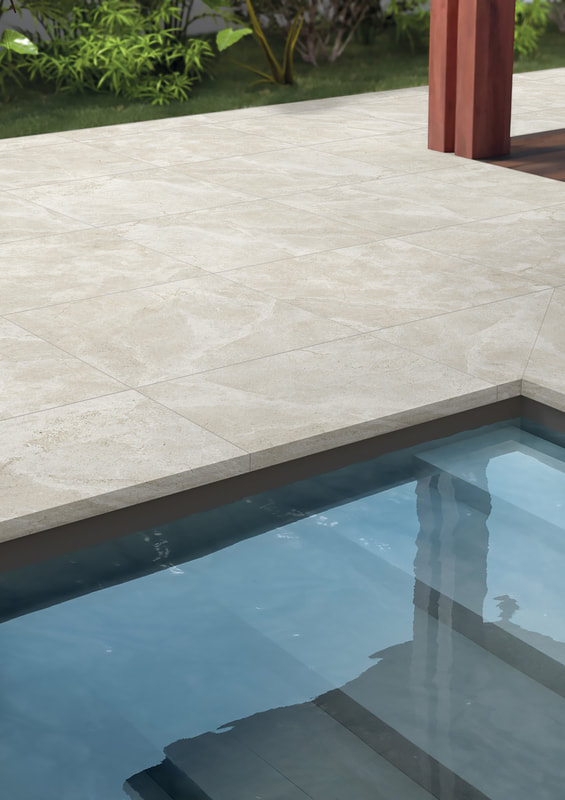 Our bullnose glazed porcelain tiles with a mitred edge apron drop edge offer the ideal blend of sophistication and practicality, elevating your pool design to new heights. Dive into a world of endless possibilities and explore our remarkable collection today. Let Nerang Tiles be your partner in creating a poolside haven that leaves a lasting impression.
Transform Your Gold Coast Pool with Nerang Tiles' Ultimate Pool Coping and Surrounding Tiles8/15/2023 G'day Gold Coast homeowners! If you're diving into the exciting journey of building a new swimming pool or revamping an old one, look no further. Nerang Tiles is here to elevate your poolside paradise with our cutting-edge 400x600mm Glazed Porcelain Pool Coping and Bullnose Tiles, backed by a range of surrounding tiles that redefine beauty and safety. Get ready to splash into a world of elegance, durability, and unmatched style.
Surround Yourself in Splendor: The Ultimate Surrounding TilesMatch your pool coping with our stunning range of surrounding tiles, available in versatile sizes like 600x600mm, 300x600mm, and 600x1200mm. What sets these tiles apart is their new smooth grip finish – a game-changer in poolside aesthetics and safety. With high slip resistance, you can enjoy worry-free poolside fun without compromising on style. It's a win-win! Unleash Durability: Weather-Resistant ChampionsGold Coast weather can be unpredictable, but our tiles are built to withstand it all. Nerang Tiles' Glazed Porcelain Tiles are your pool's warriors, bravely facing everything from scorching sun to frosty mornings. These tiles are not just weather-resistant; they're scratch and stain-resistant too, ensuring your pool area remains a vision of beauty for years to come.
Low Maintenance, High Joy: Effortless BeautyWe know you'd rather enjoy your pool than worry about maintenance. That's why Nerang Tiles' Glazed Porcelain Tiles require no sealing and are incredibly low maintenance. Spend more time swimming and less time stressing – it's a poolside dream come true.  The Safe Choice: No Fire, No Smoke, No WorriesSafety is non-negotiable, which is why our tiles are designed to be fire-safe. They don't catch fire, emit smoke, or release dangerous chemicals, giving you complete peace of mind. Relax, unwind, and enjoy your pool oasis without a hint of worry. Gold Coast homeowners, your pool deserves the best, and Nerang Tiles delivers just that. Elevate your poolside haven with our 400x600mm Glazed Porcelain Pool Coping and Bullnose Tiles, complemented by our stunning surrounding tiles with the new smooth grip finish. With unrivaled durability, safety, and low maintenance, your pool area will be the envy of the neighborhood. Dive into a world of elegance and safety – Nerang Tiles has you covered, literally! Visit our showroom and embark on a journey to redefine your poolside paradise today.
Creating a luxurious and stylish bathroom retreat has never been easier, thanks to Nerang Tiles' exquisite range of bathroom tiles. As the premier tile supply business on the Gold Coast, we understand the importance of transforming your bathroom into a functional yet aesthetically pleasing space. In this blog post, we'll explore the myriad ways Nerang Tiles' bathroom tiles can elevate your bathroom design while ensuring customer satisfaction every step of the way.
Expert Guidance:At Nerang Tiles, we believe in providing the very best customer service. Our team of tile experts is ready to assist you in selecting the perfect tiles for your bathroom project. Whether you need advice on colour coordination, tile layout, or installation, we're here to ensure your journey to a stunning bathroom is smooth and satisfying. 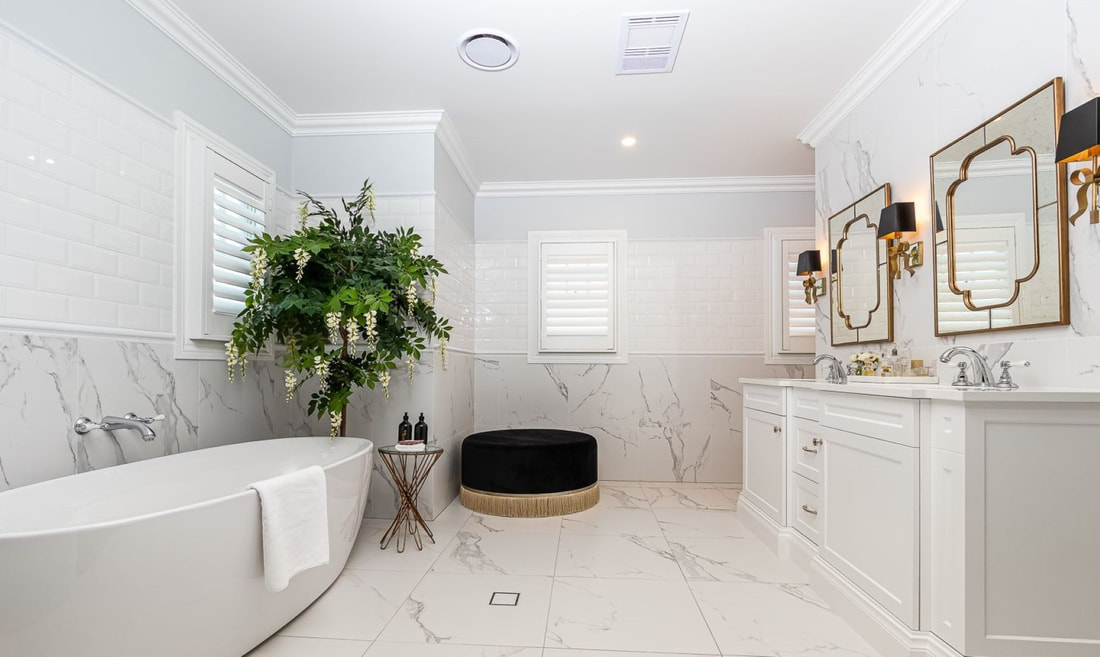 Elevate your bathroom design with Nerang Tiles' exceptional collection of bathroom tiles. With a diverse range of styles, patterns, and textures, you have the freedom to create a bathroom that reflects your unique taste. Our commitment to customer satisfaction and the highest quality ensures that your bathroom will not only look breathtaking but also stand the test of time.
Visit our showroom on the Gold Coast to explore our stunning selection and embark on the path to a bathroom transformation like no other. Let Nerang Tiles be your partner in turning your bathroom dreams into reality. Introducing the epitome of timeless elegance and refined sophistication – the 5039 Travertine Look Glazed Porcelain Tile collection. Crafted with meticulous attention to detail, these exquisite tiles bring the allure of natural travertine stone into your living spaces while offering the durability and convenience of porcelain. Available in a variety of sizes to suit your design aspirations, the 5039 Travertine Look tiles come in dimensions of 600x600mm and 600x1200mm. Whether you're looking to create a classic, seamless floor layout or prefer to explore larger formats for a more dramatic visual impact, these tiles offer versatility that harmonizes effortlessly with your interior vision.  For those who appreciate unconventional aesthetics, the Crazy Pave option is a true masterpiece. Embrace the charm of irregular patterns and let your creativity flow as you design unique, eye-catching floors that are both dynamic and mesmerizing. Elevate your design language with the timeless charm of the French Pattern tiles. Inspired by the elegance of European architecture, this pattern showcases a harmonious blend of various tile sizes, creating an intricate layout that adds depth and character to your spaces. But our offerings don't stop at indoor elegance. With the 20mm thick Pool Coping Bullnose Tiles, you can seamlessly extend your design prowess to your outdoor oasis. Crafted to withstand the rigors of poolside environments, these tiles not only enhance the safety of your pool but also amplify its aesthetic appeal, creating a cohesive transition from your indoor spaces to the open-air serenity.  Each tile in the 5039 Travertine Look collection is meticulously glazed, replicating the authentic charm of natural travertine. The subtle variations in shade, texture, and veining evoke a sense of genuine craftsmanship, while the porcelain material ensures resilience against wear, staining, and moisture, making these tiles ideal for high-traffic areas, both indoors and out. Upgrade your living spaces with the 5039 Travertine Look Glazed Porcelain Tile collection, where tradition meets innovation, and artistry intertwines with functionality. Discover the epitome of luxury, beauty, and endurance in every square inch.  Are you ready to transform your Gold Coast abode into a stunning masterpiece? Look no further than Nerang Tiles – your ultimate destination for premium tiles that blend style, quality, and affordability. Whether you're embarking on a full home renovation or simply looking to add a touch of elegance, Nerang Tiles has the perfect tile solutions to bring your vision to life. 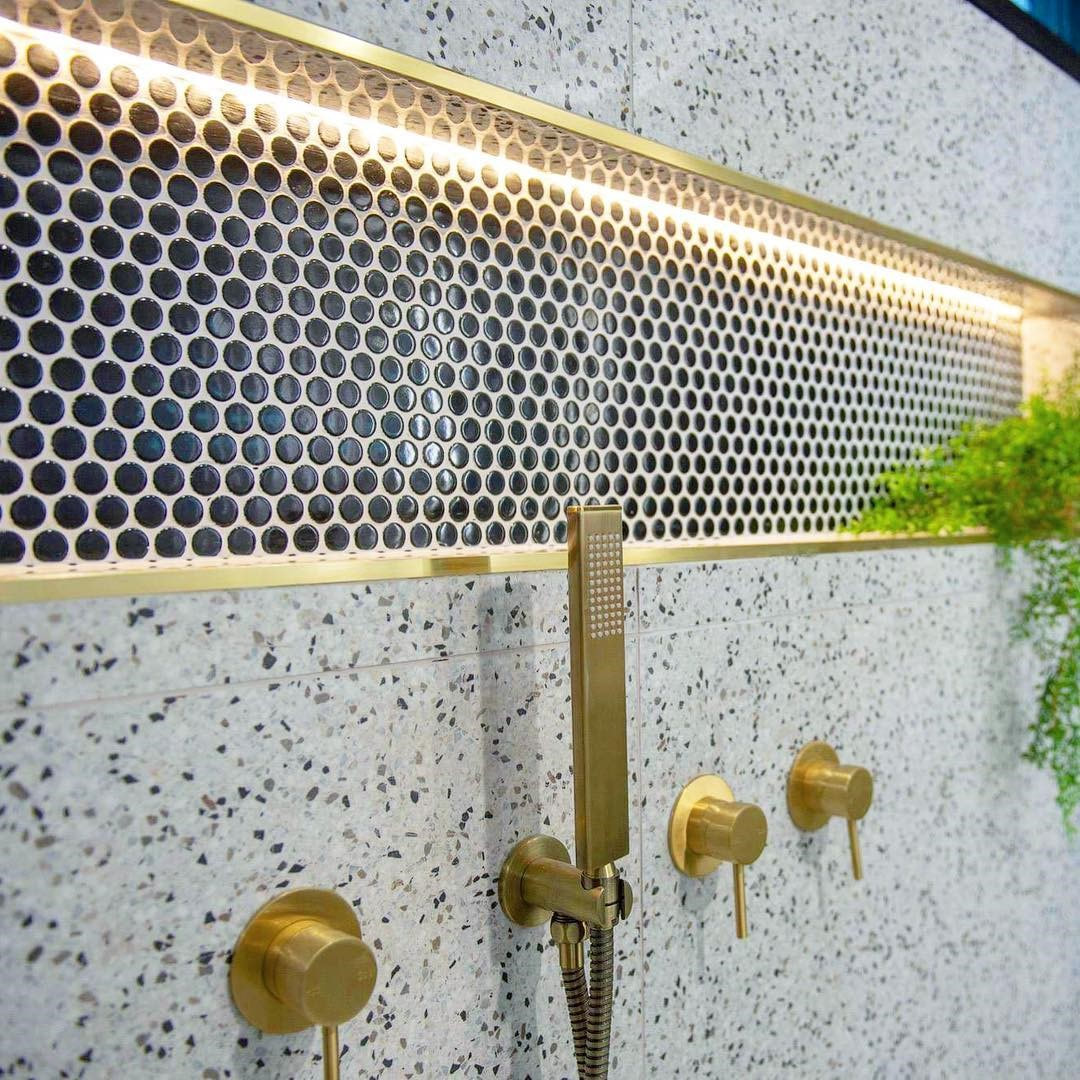 Unveiling Unrivaled Elegance: Nerang Tiles' Exquisite Collection Nestled amidst the breathtaking landscapes of the Gold Coast, Nerang Tiles has been a cornerstone of sophistication and style for tile enthusiasts. With a legacy spanning decades, their commitment to innovation and design excellence is second to none. Explore Endless Possibilities:Nerang Tiles offers an extensive array of tiles that cater to every aesthetic preference and functional need. From sleek and modern to timeless and classic, their diverse collection ensures that you'll find the perfect fit for any space in your home. Whether you're revamping your kitchen, bathroom, or outdoor oasis, Nerang Tiles has tiles that harmonise seamlessly with your lifestyle. Quality RedefinedWhen it comes to tiles, quality is non-negotiable. Nerang Tiles takes pride in curating tiles that not only captivate with their beauty but also stand the test of time. Crafted with precision and utilising the finest materials, these tiles are engineered to withstand daily wear and tear, ensuring your investment remains as striking as the day they were installed. Why Choose Nerang Tiles for Your Gold Coast Tile Journey Expertise that Matters: With a team of seasoned experts, Nerang Tiles offers invaluable guidance throughout your tile selection process. Their knowledgeable staff is equipped to assist you in making informed decisions, from choosing the ideal tile type to selecting the perfect color palette, all tailored to your individual preferences and the unique character of your home. 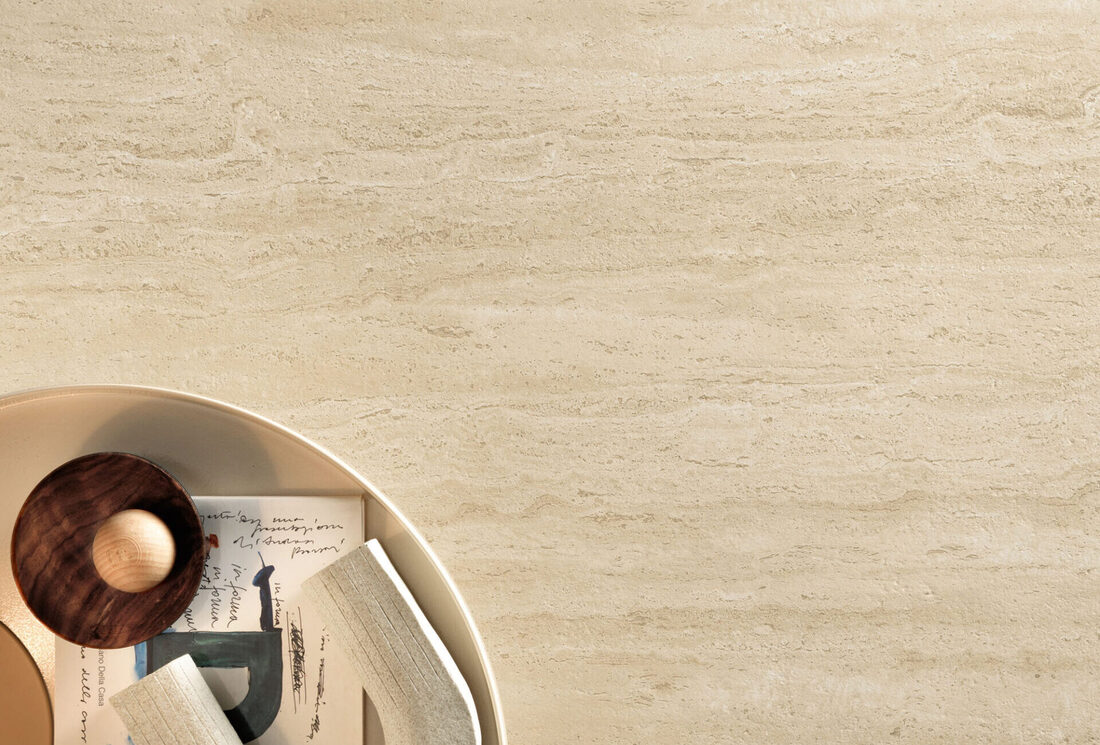 Embrace Creativity: Nerang Tiles believes that every homeowner deserves a canvas to express their creativity. Their vast selection of tiles opens up a world of design possibilities, empowering you to turn your dreams into reality. Create mesmerizing mosaic patterns, experiment with bold accents, or opt for a serene monochromatic theme – the choice is yours. Unparalleled Convenience: Shopping for tiles shouldn't be a hassle. Nerang Tiles offers a seamless and convenient experience, ensuring you find the perfect tiles without the stress.  Visit Nerang Tiles Today and Elevate Your Gold Coast Living Your quest for the finest tiles on the Gold Coast ends at Nerang Tiles. With a legacy of excellence, an extensive selection, and a commitment to customer satisfaction, Nerang Tiles stands as the premier destination for homeowners seeking to enhance their spaces with unparalleled beauty and quality. Revitalise your Gold Coast residence today – visit Nerang Tiles and embark on a journey of transformation that promises to leave an indelible mark of sophistication and elegance. Your dream home awaits, and Nerang Tiles is here to help you realize it.
Enhance Your Pool's Aesthetics with the 9056-MON-NOSE Bullnose Pencil Edge Tile (600x400x20mm)7/17/2023 Welcome to the world of swimming pool perfection! If you're looking to create a breathtaking oasis around your pool, the 9056-MON-NOSE Bullnose Pencil Edge Tile (600x400x20mm) is the ultimate choice. Designed with meticulous attention to detail, this tile effortlessly enhances the aesthetics of your swimming pool while providing exceptional durability. Unparalleled Style:The 9056-MON-NOSE Bullnose Pencil Edge Tile is a true showstopper. Its elegant design and smooth, refined pencil edge instantly elevate the appearance of your swimming pool. The sleek and modern look of this tile adds a touch of sophistication, creating a visually stunning environment that will leave your guests in awe. Superior Durability:Built to withstand the test of time, this tile is crafted with durability in mind. Made from high-quality materials, the 9056-MON-NOSE Bullnose Pencil Edge Tile is resistant to fading, chipping, and cracking. Its robust construction ensures that it can handle the demands of a poolside setting, including exposure to water, chemicals, and varying weather conditions. With this tile, you can enjoy a beautiful poolside retreat for years to come. Perfect Dimensions: The 600x400x20mm dimensions of this tile offer both practicality and versatility. The generous size provides ample surface area, allowing for comfortable lounging or walking around the pool. Its optimal thickness ensures stability and longevity, making it suitable for heavy foot traffic. Whether you're designing a new pool or renovating an existing one, the 9056-MON-NOSE Bullnose Pencil Edge Tile fits seamlessly into any project. Effortless Installation: Installing the 9056-MON-NOSE Bullnose Pencil Edge Tile is a breeze. Its precise dimensions and smooth edges facilitate a seamless fit, ensuring a professional-looking result. Whether you're a DIY enthusiast or relying on professional installers, this tile's user-friendly design saves time and effort, making your pool project a hassle-free experience. Transform your swimming pool into a stunning oasis with the 9056-MON-NOSE Bullnose Pencil Edge Tile (600x400x20mm). Its unmatched style, exceptional durability, and seamless installation make it the ideal choice for pool owners seeking perfection. Order your 9056-MON-NOSE Tile today and enjoy the benefits of a visually striking and long-lasting poolside paradise.
Premium Tiles on Sale - Nerang Tiles Offers $29.95 per m2 for 600x600 Concrete-Look Porcelain Tiles!7/6/2023 Looking to purchase top-quality tiles for your home? Don't miss Nerang Tiles' exclusive offer: $29.95 per m2 for 600x600 matt rectified glazed porcelain tiles in a stunning concrete look. Perfect for any area inside or outside your home. Visit us today! 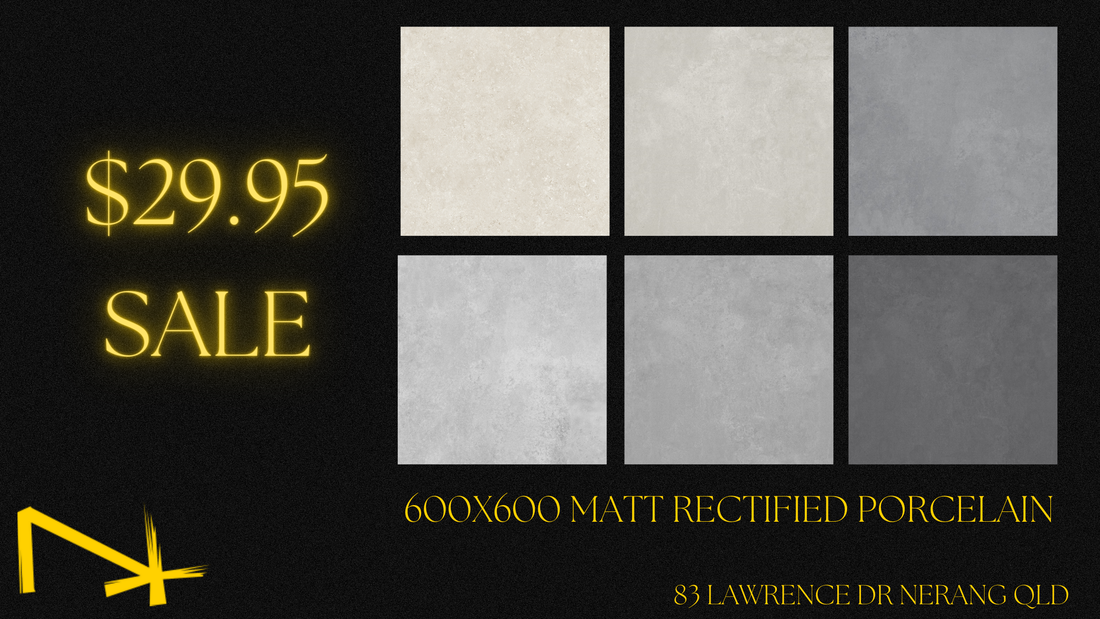 Are you in the market for premium tiles to enhance the beauty of your home? Look no further! Nerang Tiles presents an unbeatable offer: $29.95 per m2 for our remarkable 600x600 matt rectified glazed porcelain tile range in a captivating concrete look. This limited-time sale is sure to meet your expectations while providing excellent value for your investment.
Whether you're considering renovating your bathroom, upgrading your kitchen, or transforming your outdoor spaces, our concrete-look porcelain tiles are the perfect choice. With their impeccable design and versatility, they harmoniously blend with any interior or exterior style, bringing a touch of elegance to every space. What sets our porcelain tiles apart is their exceptional quality and durability. Made from high-grade materials, they are resistant to stains, scratches, and fading, ensuring their long-lasting beauty. These tiles are designed to withstand the test of time, making them suitable for all areas of your home, both inside and out. At Nerang Tiles, we understand that our customers value variety and choice. That's why we offer an extensive range of concrete-look porcelain tiles, providing you with a wide selection of colors, textures, and finishes. Whether you prefer a sleek, modern aesthetic or a rustic, natural charm, we have the perfect tile to complement your vision. At Nerang Tiles, customer satisfaction is our top priority. We strive to provide the highest level of service, quality products, and competitive pricing. Our aim is not only to meet but exceed your expectations, ensuring that your tile purchase brings lasting beauty and joy to your home. Don't miss this incredible opportunity to enhance your living spaces with top-quality porcelain tiles. Visit Nerang Tiles today and take advantage of our limited-time $29.95 per m2 sale on our 600x600 matt rectified glazed porcelain tile range in a captivating concrete look. Trust Nerang Tiles to deliver exceptional value and transform your home into a haven of elegance. https://www.nerangtiles.com.au/budget-cheap-tiles-gold-coast.html Mosaic tiles have the remarkable ability to infuse spaces with elegance and character. Among these stunning mosaic options is the captivating D070/MOS. In this blog post, we invite you to explore the timeless allure of D070/MOS mosaic tiles, featuring a subtle grayish blue hue and meticulous craftsmanship. 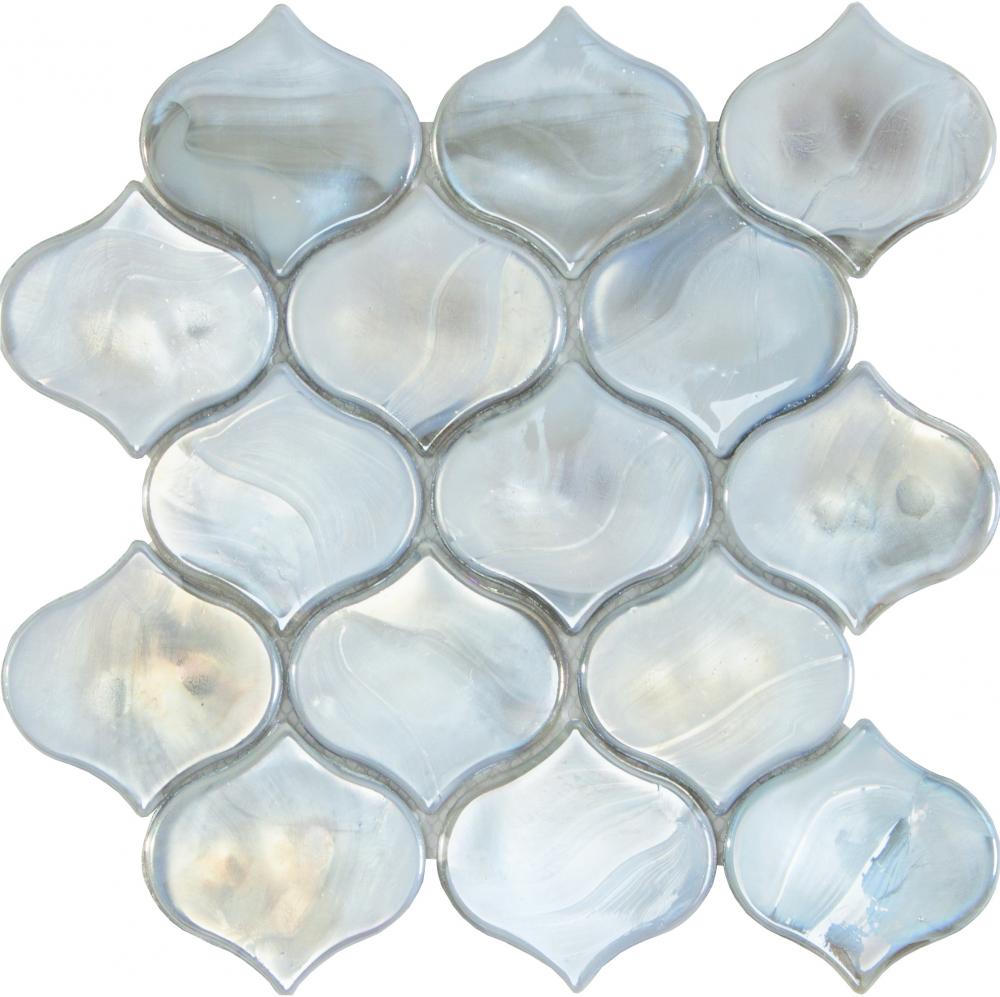 Crafted Beauty: D070/MOS mosaic tiles are meticulously handcrafted from glass tesserae, resulting in a product that showcases the artistry and attention to detail. Each tile is a testament to the skilled craftsmanship that goes into creating a distinctive and captivating appearance. Subtle Elegance: The delicate grayish blue hue of D070/MOS mosaic tiles adds a touch of understated elegance to any space. Its subdued tone exudes serenity and sophistication, making it a versatile choice for various design styles. Whether you're aiming for a modern, classic, or eclectic look, the subtle color palette of D070/MOS effortlessly complements and enhances your space. Artful Geometry: Drawing inspiration from geometric patterns, D070/MOS mosaic tiles feature an arrangement that adds depth and visual interest to your design. The harmonious balance between form and function creates a captivating focal point or a seamless background accent, allowing you to unleash your creativity and personalize your space. 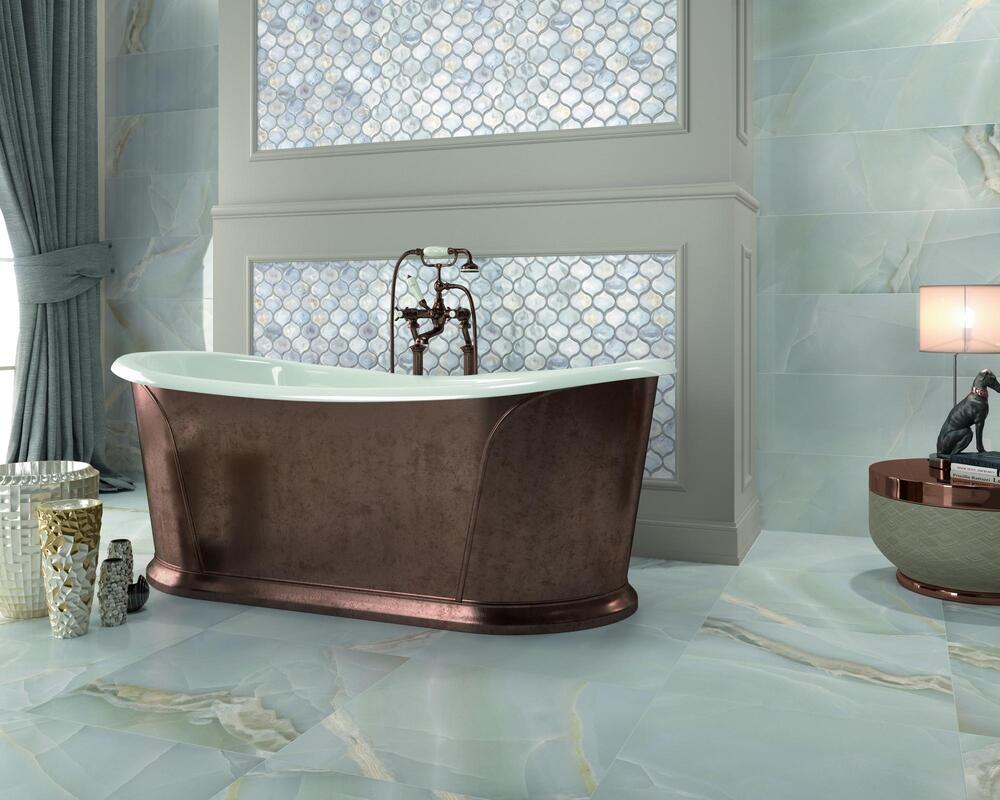 Versatile Design Possibilities: With its compact size of 24.8×25.7 cm, D070/MOS mosaic tiles offer endless design possibilities. Use them to create stunning feature walls, eye-catching backsplashes, or elegant border accents. The versatility of D070/MOS allows you to experiment with layouts and bring your unique vision to life. The Magic of Glass: Glass mosaic tiles possess a captivating quality that adds a touch of luxury to any setting. The reflective properties of D070/MOS tiles enhance the interplay of light, creating a sense of depth and luminosity. This captivating combination of texture and sheen elevates the overall ambiance of your room, adding a layer of sophistication. D070/MOS mosaic tiles are not just a decorative element but a reflection of artistry and craftsmanship that bring charm and elegance to your space. With its subtle grayish blue hue, captivating patterns, and versatile size, D070/MOS mosaic tiles open up a world of design possibilities. Transform your living spaces into captivating havens where every detail speaks of sophistication and timeless beauty. Embrace the captivating charm of D070/MOS and let your creativity shine through.
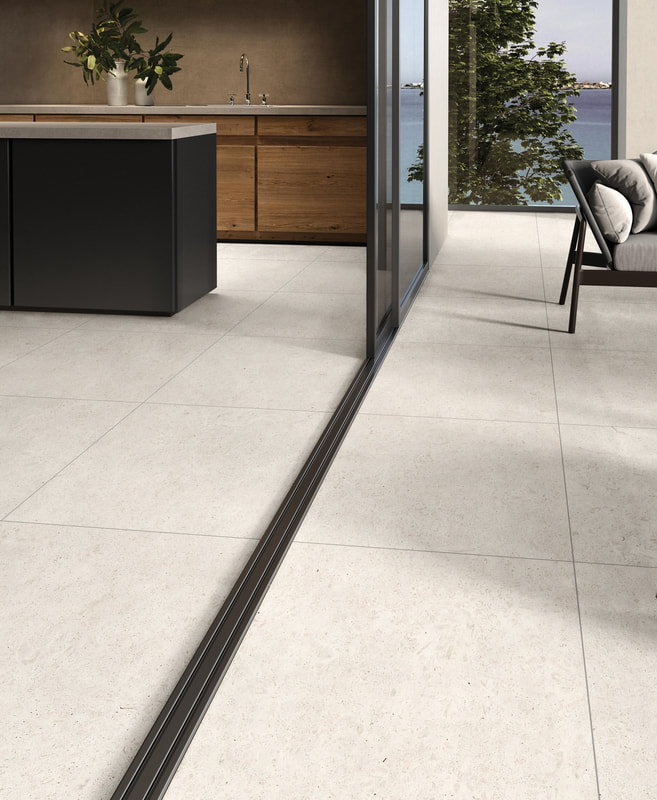
Welcome to Nerang Tiles, where style meets functionality. Introducing our exquisite LL059-IVO Stone Look Tile, a perfect choice for those seeking a sophisticated and slip-resistant tile solution. With its smooth aesthetic, high slip resistance, and impressive size of 600x1200 mm, this matt rectified glazed porcelain tile is designed to transform any residential or commercial space into a visually stunning and safe environment. Sleek Aesthetic and Feel:
Versatile Application:
Durability and Low Maintenance: Investing in the LL059-IVO Stone Look Tile means investing in a long-lasting and low-maintenance solution. Crafted from high-quality rectified glazed porcelain, this tile is highly resistant to wear, fading, and staining. Its robust construction ensures that it withstands the test of time, even in high-traffic areas. Additionally, the smooth surface makes cleaning a breeze, saving you valuable time and effort in maintenance. 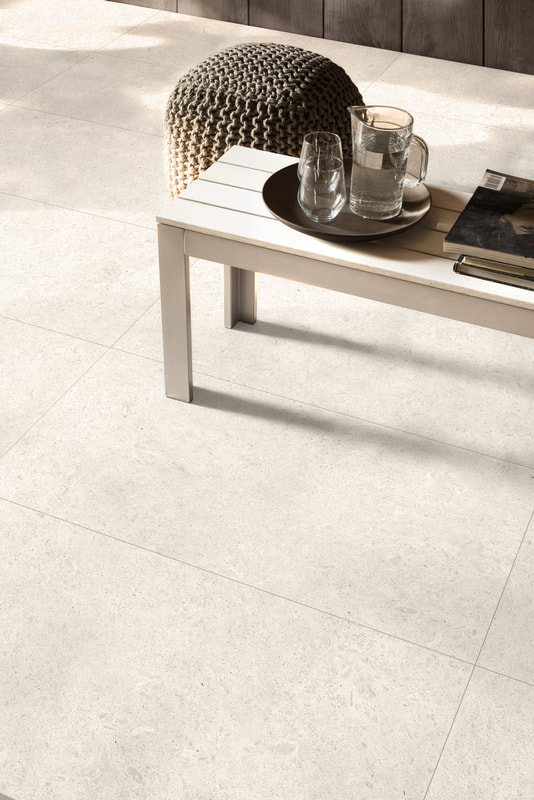 Elevate your space with the LL059-IVO Stone Look Tile from Nerang Tiles. Combining a sleek aesthetic, high slip resistance, and versatile application options, this 600x1200 mm matt rectified glazed porcelain tile is a perfect choice for indoor and outdoor installations in both residential and commercial settings. Experience the beauty, durability, and safety that this tile brings to your space. Contact Nerang Tiles today and explore the endless possibilities of the LL059-IVO Stone Look Tile.
Are you searching for a tile that effortlessly combines artistic allure and timeless beauty? Look no further than the exquisite Blue Spanish Fish Scale Mosaic Tile, D031. Handcrafted in Spain, these tiles are a true work of art, featuring a captivating fish scale pattern in a mesmerizing shade of blue. Embrace Timeless CharmThe fish scale pattern has long been associated with elegance and sophistication. The Blue Spanish Fish Scale Mosaic Tiles embrace this classic motif, adding a touch of enchantment to your interior design. The flowing curves and interlocking shapes create a sense of movement and fluidity, instantly capturing attention and igniting a sense of wonder.  The Allure of BlueBlue is a color that evokes a range of emotions, from calm and tranquility to freshness and vitality. The vibrant blue hue of these mosaic tiles infuses your space with a soothing ambiance, reminiscent of the breathtaking shades of the ocean. Whether used as a bold backsplash or a statement feature wall, the Blue Spanish Fish Scale Mosaic Tiles breathe life into any room, creating a serene and captivating atmosphere. 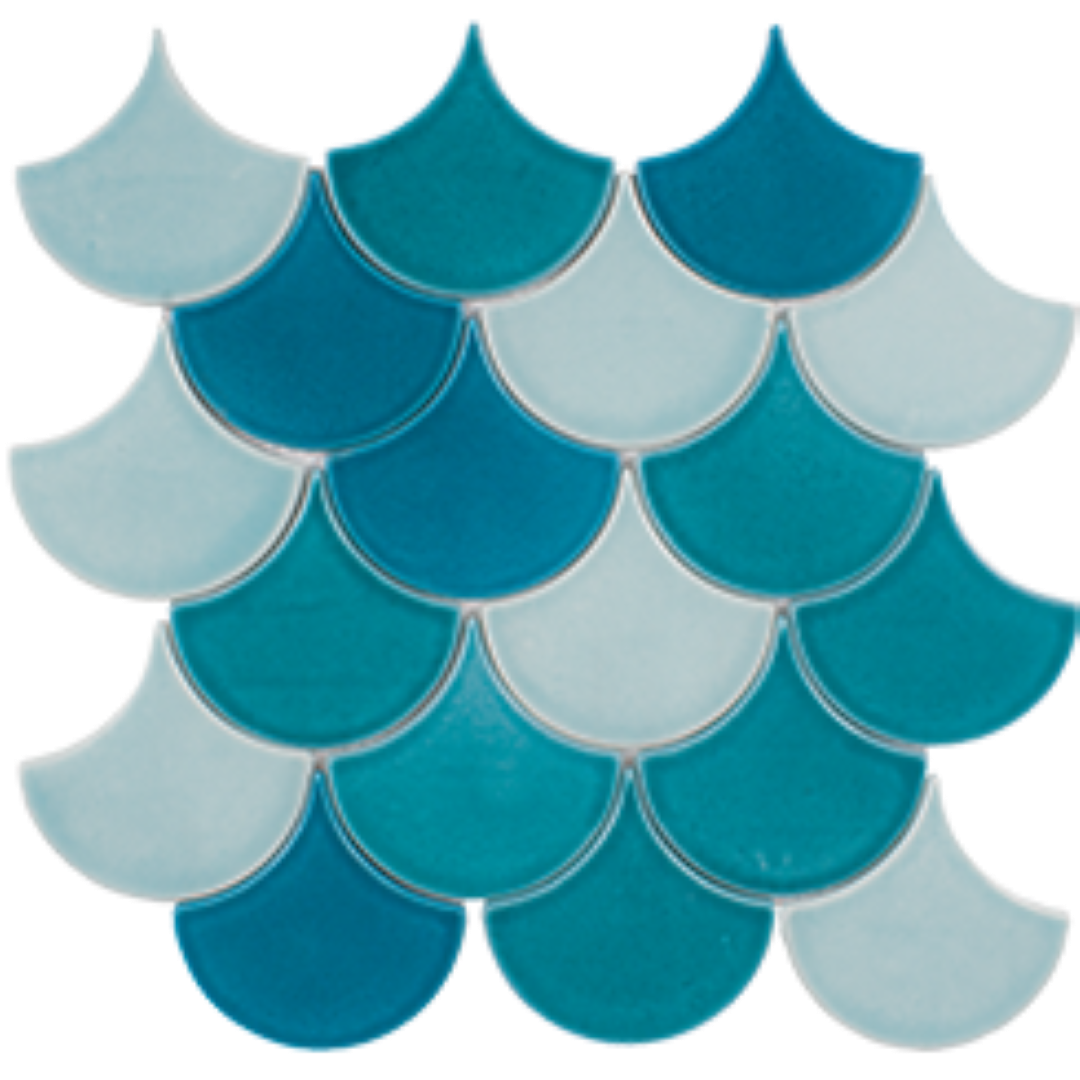 Uncompromising CraftsmanshipHandcrafted in Spain, renowned for its ceramic heritage, these mosaic tiles exemplify exceptional craftsmanship. Each tile is meticulously crafted with attention to detail, ensuring a flawless finish that radiates quality and luxury. The use of high-quality materials guarantees the longevity and durability of these tiles, making them a worthy investment for your space. Versatility Meets CreativityThe versatility of the Blue Spanish Fish Scale Mosaic Tiles allows for endless creative possibilities. Whether you are aiming for a contemporary, coastal, or eclectic aesthetic, these tiles seamlessly blend with various interior styles. Create a stunning backsplash in your kitchen, add a touch of luxury to your bathroom, or make a dramatic statement in your living room—the choice is yours. Effortless MaintenanceIn addition to their beauty and durability, these mosaic tiles are designed with practicality in mind. They are resistant to stains, moisture, and everyday wear, making them easy to clean and maintain. Spend less time worrying about upkeep and more time enjoying the captivating allure of these tiles. Elevate the ambiance of your space with the Blue Spanish Fish Scale Mosaic Tiles. With their timeless charm, captivating blue hue, impeccable craftsmanship, and versatility, these tiles are the perfect choice to infuse your interior design with elegance and sophistication. Let Nerang Tiles be your trusted source for these mesmerizing mosaic tiles, bringing enchantment and creativity to your home or business. Visit our showroom or contact us today to explore the possibilities and embark on a transformative journey with Blue Spanish Fish Scale Mosaic Tiles.
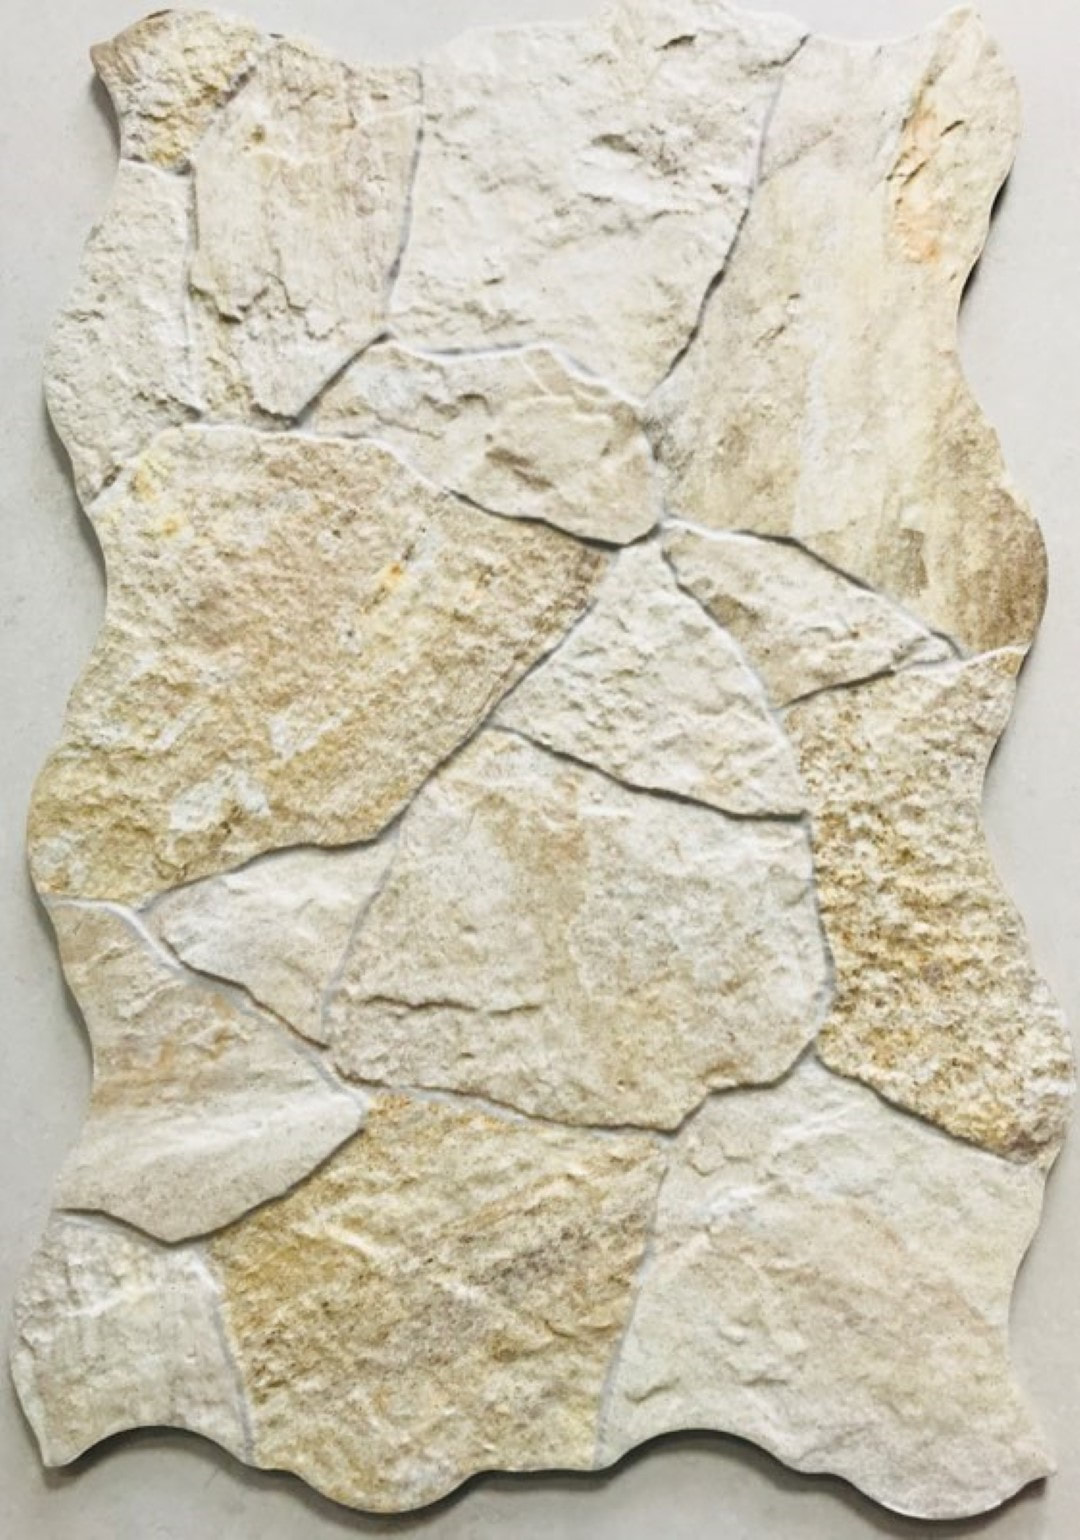
Transforming your TV feature wall into a captivating focal point can be achieved through the artful combination of design elements. One striking option to consider is utilising stone cladding look tiles. In this blog post, we will explore the elegance and versatility of Nerang Tiles' beige/ivory and white stone cladding look tile (4244 product), specially curated for coastal and light-themed designs. Discover how the installation's mitred joints elevate the aesthetic appeal while maintaining a seamless appearance. Embrace the Coastal VibeWith its soothing beige/ivory and white tones, Nerang Tiles' stone cladding look tile exudes coastal charm. Bring the calming essence of the beach into your home by incorporating these tiles into your TV feature wall design. The natural appeal and textured surface create a visual connection to coastal landscapes, evoking a sense of tranquility and serenity. Nerang Tiles has a range of stone cladding look tiles on display at its Gold Coast showroom in various colours, designs and textures. Versatile Design PossibilitiesThe beauty of stone cladding look tiles lies in their adaptability to various design styles. Whether you're aiming for a contemporary coastal retreat or a light-themed sanctuary, these tiles effortlessly blend with different aesthetics. Their neutral colour palette allows for seamless integration into existing interior schemes while adding a touch of sophistication. 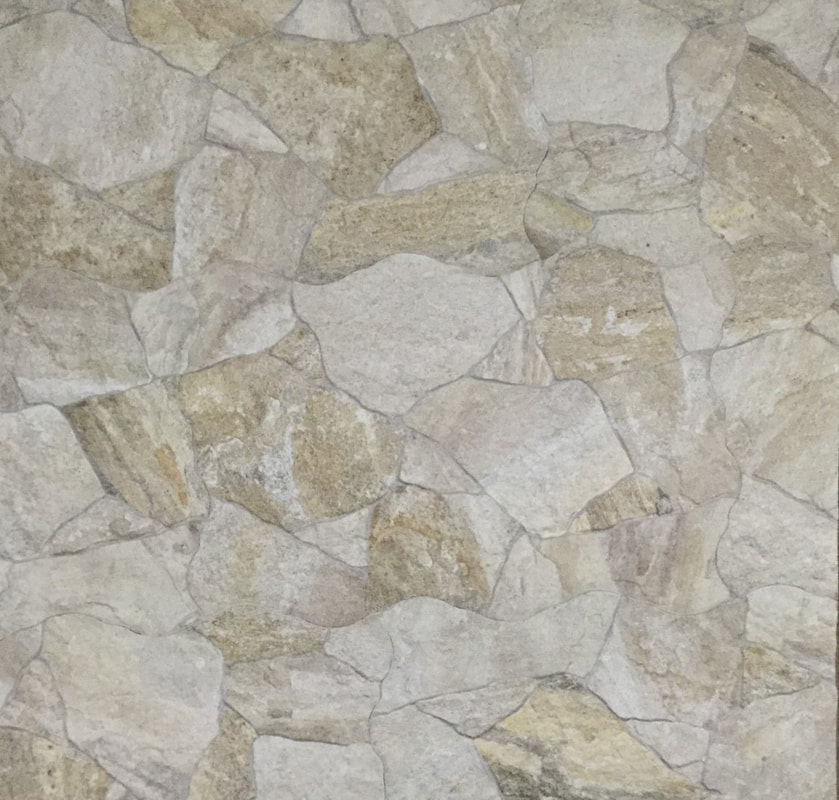 Captivating Mitred JointsAchieving a flawless finish is crucial when it comes to TV feature wall installations, and Nerang Tiles ensures just that with their attention to detail. The mitred joints technique employed during installation creates sleek, continuous lines that enhance the overall appearance of the wall. The absence of visible seams adds a sense of refinement, showcasing the tile's natural beauty without interruption. Elevate the TV Viewing ExperienceNot only do stone cladding look tiles enhance the aesthetics of your TV feature wall, but they also contribute to the overall ambiance of your entertainment area. The textured surface of these tiles adds depth and visual interest, creating a captivating backdrop that enhances the viewing experience. The combination of the tile's elegance and the captivating appeal of your favorite shows or movies ensures a truly immersive entertainment space. Durability and Low Maintenance
|
- Home
-
Tiles
- Brick Look Tiles >
- Concrete Look Tiles >
- Steel Look Tiles >
-
Decorative Tiles
>
- 3D Feature Tiles >
- Aged, Worn & Antique Look Tiles
- Capping, Listello and Pencil Tiles
- Chevron Tiles
- Embossed Feature Tiles
- Feature Tiles
- Fish Scale Tiles
- Floral Tiles >
- Flute Tiles
- Geometric Tiles >
- Herringbone Tiles
- Kit Kat Look Tiles
- Lantern Tiles
- Penny Round Look Tiles
- Popsicle Look Tiles
- Retro & Funky Look Tiles
- Tessellated Tiles
- French Pattern Tiles >
-
Hand Made Look Tiles
>
-
Square - Hand Made Look Tiles
>
- Beige - Square Hand Made Look Tiles
- Black - Square Hand Made Look Tiles
- Blue - Square Hand Made Look Tiles >
- Colour - Square Hand Made Look Tiles
- Green - Square Hand Made Look Tiles >
- Grey Scale - Square Hand Made Look Tiles
- Patterned - Hand Made Look Tiles
- Pink - Square Hand Made Look Tiles
- Red - Square Hand Made Look Tiles
- Terracotta - Square Hand Made Look Tiles
- White - Square Hand Made Look Tiles
- Yellow - Square Hand Made Look Tiles
-
Subway - Hand Made Look Tiles
>
- Black - Subway Hand Made Look Tiles
- Blue - Subway Hand Made Look Tiles >
- Colour - Subway Hand Made Look Tiles
- Green - Subway Hand Made Look Tiles >
- Grey Scale - Subway Hand Made Look Tiles
- Pink - Subway Hand Made Look Tiles
- Red - Subway Hand Made Look Tiles
- Terracotta - Subway Hand Made Look Tiles
- White - Subway Hand Made Look Tiles
- Yellow - Subway Hand Made Look Tiles
-
Square - Hand Made Look Tiles
>
-
Marble Look Tiles
>
- Neutral & Plain Tiles >
-
Pattern Tiles
>
- 3D Look - Pattern Tiles
- Aged, Weathered and Worn - Pattern Tiles
- Black & White - Pattern Tiles
- Circular - Pattern Tiles
- Colonial & Heritage - Pattern Tiles
- Geometric - Pattern Tiles
- Made to Order - Pattern Tiles >
- Mediterranean & Moroccan - Pattern Tiles
- Modern & Contemporary - Pattern Tiles
- Multi Pattern - Pattern Tiles
- Star Shape - Pattern Tiles
- Terrazzo Look - Pattern Tiles
- Wall Only - Pattern Tiles
-
Stone Look Tiles
>
- Actinolite & Chlorite - Stone Look Tiles
- Black - Stone Look Tiles
- Bluestone - Look Tiles
- Bronzite - Stone Look Tiles
- Dark - Stone Look Tiles
- Decorative - Stone Look Tiles >
- Granite - Stone Look Tiles
- Ivory - Stone Look Tiles
- Light - Stone Look Tiles
- Limestone Look - Stone Tiles >
- Sandstone - Look Tiles
- Slate - Look Tiles
- Washed - Stone Look Tiles >
- Weathered Stone Look Tiles
- White - Stone Look Tiles
-
Subway Tiles
>
- Arrowhead - Subway Tiles
- Bevelled - Subway Tiles
- Black - Subway Tiles
- Blue - Subway Tiles >
- Brown - Subway Tiles
- Colour - Subway Tiles
- Concrete - Look Subway Tiles
- Decorative - Subway Tiles
- Embossed - Subway Tiles
- Green - Subway Tiles >
- Grey - Subway Tiles >
- Ivory & Beige - Subway Tiles
- Lookalike - Subway Tiles
- Pattern - Subway Tiles
- Purple - Subway Tiles
- Orange - Subway Tiles
- Pink - Subway Tiles
- Red - Subway Tiles
- Travertine Look- Subway Tiles
- Weathered or Worn - Subway Tiles
- White - Subway Tiles >
- Talavera Tiles >
- Terracotta Tiles >
- Terrazzo Look Tiles >
- Timber Look Tiles >
-
Travertine Look Tiles
>
-
Mosaic Tiles
- Chevron Mosaic Tiles
- Feather Mosaic Tiles >
-
Finger | Kit Kat Mosaic Tiles
>
- Black - Finger | Kit Kat Mosaic Tiles
- Blue - Finger Mosaic Tiles >
- Colour - Finger | Kit Kat Mosaic Tiles
- Green - Finger Mosaic Tiles >
- Grey Scale - Finger or Kit Kat Mosaic Tiles
- Natural Stone - Finger | Kit Kat Mosaic Tiles
- Pink - Finger | Kit Kat Mosaic Tiles
- White - Finger | Kit Kat Mosaic Tiles
- Fish Scale | Scallop | Mermaid | Fan Mosaic Tiles >
- General | Mosaic Tiles
-
Geometric Mosaic Tiles
>
- Black - Geometric Mosaic Tiles
- Blue & Green - Geometric Mosaic Tiles
- Colour - Geometric Mosaic Tiles
- Dark Marble Look - Geometric Mosaic Tiles
- Beige - Geometric Mosaic Tiles
- Metallic - Geometric Mosaic Tiles
- Pink, Red & Orange - Geometric Mosaic Tiles
- White - Geometric Mosaic Tiles
- White Marble Look - Geometric Mosaic Tiles
- White Marble Decorator Geometric Mosaic Tiles
- Glass Mosaic Tiles >
-
Herringbone Mosaic Tiles
>
- Black - Herringbone Mosaic Tiles
- Black Marble Look - Herringbone Mosaic Tiles
- Blue & Green - Herringbone Mosaic Tiles
- Colour - Herringbone Mosaic Tiles
- Pink & Red - Herringbone Mosaic Tiles
- Timber Look - Herringbone Mosaic Tiles
- White - Herringbone Mosaic Tiles
- White Marble Look - Herringbone Mosaic Tiles
- Lantern Mosaics
- Metallic | Mosaic Tiles
- Mosaic Tile Murals >
-
Penny Round Mosaic Tiles
>
- Black - Penny Round Mosaic Tiles
- Black Marble Look - Penny Round Mosaic Tiles
- Blue - Penny Round Mosaic TIles
- Colour - Penny Round Mosaic Tiles
- Green - Penny Round Mosaic Tiles
- Grey Penny Round Mosaic Tiles
- Metallic - Penny Round Mosaic Tiles
- Pink - Penny Round Mosaic Tiles
- White - Penny Round Mosaic Tiles
- White Marble Look - Penny Round Mosaic Tiles
- Pebble | Mosaic
- Stone & Marble Look Mosaic Tiles >
- Tessellated Mosaic Tiles
-
Pool Tiles
-
Pool Coping & Nosing Tiles
>
-
Pool Tile Mosaics
>
- Anti Slip - Pool Tile Mosaics >
- Black - Pool Tile Mosaics
- Blue Pool Tile Mosaics >
- Brown - Pool Tile Mosaics
- Colour - Pool Tile Mosaics
- Corner & Coving - Pool Tile Mosaics >
- Decorative - Pool Tile Mosaics >
- Glow in the Dark - Pool Tile Mosaics >
- Green - Pool Tile Mosaics >
- Grey - Pool Tile Mosaics
- Metallic - Pool Tile Mosaics >
- Murals - Pool Tile Mosaics >
- Pattern - Pool Tile Mosaics
- Pink - Pool Tile Mosaics
- Orange - Pool Tile Mosaics
- Red - Pool Tile Mosaics
- Stone Look Pool Tile Mosaics >
- White - Pool Tile Mosaics
- Yellow - Pool Tile Mosaics
-
Pool Coping & Nosing Tiles
>
- Pavers
-
Porcelain Slabs
- Hybrid Planks
- Laminate
- Vinyl
-
More Products
-
ABOUT US
- About
-
Services
>
- Architects
- Builders
- Colour Consult
- Home Owners
- Pool Builders
- Tilers
- Tile Selection
- Tile Specification
- Interior Designers
- Inspiration >
- Insurance Tiles
-
Tile Knowledge
>
-
After Installation
>
- Before Installation >
- Blog
- Commercial Tile Guides >
-
FAQ
>
- Are Tiles Cold
- HOW MANY TILES SHOULD I ORDER?
- How to Match Existing Tiles
- What is the difference between glazed and unglazed porcelain tile?
- What Tile Grout Joint Should I Use?
- Why are some of my tiles uneven
- Why Are There Stains On My Polished Porcelain Tiles
- Why do my tiles have small cracks?
- Why Do My Tiles Appear Different To What Was Ordered
- Why Have I Received Wrong or Damaged Tiles
- Health & Safety
- Tile Applications >
-
Tile Facts
>
-
Tile Installation
>
- Tile Partners
- Tile Standards and Codes >
- Why Choose Tiles >
-
After Installation
>
- Careers
- Contact


(07) 5596 1916
83 Lawrence Drive Nerang QLD 4211
Showroom Opening Hours
Monday - Thursday |
8:00 AM - 5:00 PM |
Friday |
8:00 AM - 4:30 PM |
Saturday |
8:30 AM - 12:00 PM |
Sunday |
CLOSED |
Public Holidays |
CLOSED |
You'll be smiling, doing your tiling, when you shop at

|
Most awarded Queensland Tile Showroom
Experience the beauty and quality of Nerang Tiles - the leading tile supplier on the Gold Coast.
Our wide range of high-quality tiles, including mosaic, swimming pool, marble look, concrete look, hand-made look, and more, are perfect for adding a touch of elegance and style to any room in your home or commercial space. We provide tile selection, design and sample services for all your tile needs. Contact us today and let us help you transform your space. Follow us on social media for the latest tile trends and inspiration. Proudly serving the Gold Coast and Brisbane.
Voted Best Tile Showroom, Nerang Tiles hosts one of the largest Australian tile showrooms displaying thousands of floor tiles and wall tiles at discount prices at its Gold Coast Tile Showroom.
The Nerang Tiles Website is a gallery snapshot only. Displaying a sneak preview of the thousands of tiles on display at its Gold Coast Tile Showroom. Visit in store to see the full range and take advantage of the Nerang Tiles expert team.
Nerang Tiles is a one stop tile showroom, providing colour and design consultation to assist builders, architects, retail and interior designers tile all areas from floors, walls, bathrooms, kitchens, pools, outdoor areas, offices to driveways.
Showcasing the latest in tile design and interior tile trends, including all classic and traditional tile designs, Nerang Tiles has it all. Some of the tiles available include tiles suitable as kitchen tiles, bathroom tiles, floor tiles, wall tiles, outdoor tiles, pool tiles, feature tiles and much more.
Tile Types available at Nerang Tiles: Bathroom Tiles, Kitchen Tiles, Pool Tiles, Outdoor Tiles, Wall Tiles, Floor Tiles, Feature Tiles, Timber Look Tiles, Marble Look Tiles, Stone Look Tiles, Concrete Look Tiles, Pattern Tiles, Mosaic Tiles, Stone Veneer Cladding, Cladding Tiles, Brick Look Tiles, Subway Tiles, Talavera Tiles, Capping Tiles, Listello Tiles, Pencil Tiles, Vinyl Tiles, Safety Tiles, Geometric Tiles, Tessellated Tiles, Mercatto Tiles, Terracotta Tiles, Anti Slip Tiles, Commercial Tiles, Textured Tiles, Sealed Tiles, Structured Tiles, Scored Tiles, Pressed Edge Tiles, Rectified Tiles, Vitrified Tiles, Step Tread Tiles, Coving Tiles, Bullnosed Tiles, Glazed Tiles, Bejmat Tiles, Zellige Tiles, Kit Kat Tiles, Finger Tiles, Unglazed Tiles, Floral Tiles, French Pattern Tiles, Terrazzo Look Tiles, Glow in the dark Tiles, Glass Tiles, Encaustic Tiles, Mosaic Tile Murals, Pool Mosaic Murals, Porcelain Paver Tiles and much more.
You are sure to be smiling doing your tiling when you shop at Nerang Tiles.
Find more tile inspiration for your wall tiling or floor tiling through the Nerang Tiles' Pinterest Page, Instagram Page, Houzz Profile or Facebook Page. The Nerang Tiles Social Media pages are constantly updated with new tiles arriving in store and designed inspiration from tile factories and customers for our viewing pleasure.
*Photos are an indication of colour only. Actual goods may vary from images shown due to device display settings, product batch variations and fine detail, and may not be available. Please contact Nerang Tiles to check availability, request samples or view display items .
Information on this website is to be used as a guide only and should not be taken to constitute current professional advice or a formal recommendation and we exclude all representation and warranties in relation to the content of this website. All consumers should seek professional advice through their local Builder's Association for specific, current and individual application.